Last weekend I finished up with the Irtfa'a shawl, and yesterday I stuffed it into an envelope and mailed it off to my beloved mother-in-law.
If anyone else is still in the process, here are my final notes on finishing the sucker off.
Previous diaries in this series are #1, #2 (reading charts), and #3 (small and large feathers).
First tip: before starting the edging, when purling across the last row of the body, switch over to your #3 needles -- it is easiest to have the body on a circular while doing the border, but it really seems to me be the height of stoopid to purl that final row and then, in a separate operation, transfer the stitches to the #3 needle.
 Second tip: Ignore any references to "knitting" and "purling". Knit every stitch on every row.
You can even ignore references to how the stitches slant on the decreases if you want.
Why, you may ask?
Well, I have the answer!
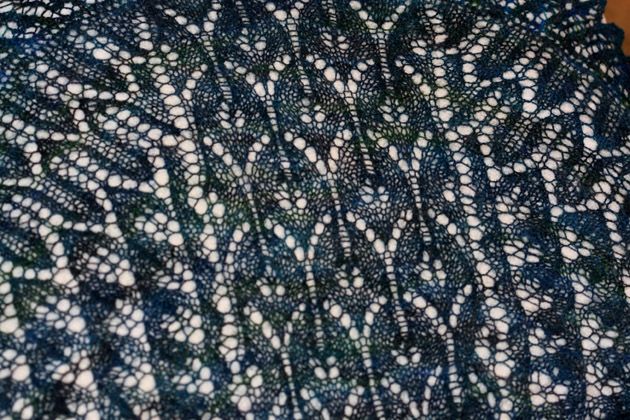
The border is knit lace, rather than lace knitting -- that is, the border has decreases/yarn over patterning in all rows, not just every other row.
Plus, it's done on a garter stitch background.
The thing is, with knit lace on a garter stitch background, the combination of the competing tensions of knits/purls in the garter stitch and the every-row patterning cancels out the "slant" of any given decrease -- the yarn overs have more bearing on where the line is going.
Additionally, the patterning is so busy with all the bumps and lines and holes and decreases, no one will ever notice that the bind-offs appear as knit on one side, purl on the other side.
I also found that whole business of stopping in the middle, then starting again on the left edge, to be pretty dumb, too -- but I didn't have brain power going at the time (mmmm.... Percocet....) to sit down and figure out a better way to do it.
Anywhoo -- it probably will take you a 20 or 30 repeats of the 8 row pattern to really get the hang of it, such that you're not stuck constantly checking at the pattern. The first few repeats will likely drive you batshit if you've never done lace knitting, rather than knit lace, before. You might want to practice with some scrap yarn before tackling doing the actual border.
But eventually, you will get the hang of it. I found it helped me remember to pair the rows together into going in/going out sets.
The first set I called the "set up" -- binding off the first eight stitches, doing the pattern to the end, turning around, then a row where the only patterning were yarn overs near the beginning and the end.
The next set was the "weirdo rows" -- had to pay closer attention here, because the decreases were arranged differently than in other places and it was really easy to get off track.
The third set was the "knit three" set -- after the knit 2, double yarn/over of the "going in" row, it was knit 3 before the rest of the patterning started; on the "going out" row, it also started "knit three", after slipping the first stitch.
The last set was the "all out/knit one" set -- with the "going in" row you knit until you hit the first yarn over then do the patterning, and the "going out" row started knit one.
Oh, and on a side note re slipping that first stitch? I found it worked best to slip the stitch as if to purl with the yarn in back, then put the yarn in front between the slipped stitch and the stitch to be knit. Doing it that way kept everything lined up to where it's really hard to see where the border attaches to the body.
There are 58 repeats of the border on each side, for a total of 116 repeats. You'll have lots of practice at memorizing it. And because there are so many repeats it's really easy to get discouraged.
When looking at something that seems too batshit daunting to even consider, I like to break it down, setting small goals (5 or 10 repeats a day) that will give you an idea of how long it's going to take. I also put a marker on every tenth repeat so I can easily see how much I've accomplished (rather than looking at the stitches still on the needle and overestimating how very far I have to go).
And then, once you have it all knit, because of that split in the middle of the border, you get the joy of grafting, a/k/a Kitchener Stitch -- which really isn't as hard as it seems. Like most of the more complicated maneuvers you just have to get your rhythm going.
Put each set of stitches on a separate needle, then hold them, wrong sides together, one in front of the other and with a finger separating them. Thread a tapestry needle with a goodly length of the yarn coming off of one of the sets of stitches.
You're going to go through each stitch twice -- because you're creating a knit loop in stitch.
First you have to do the set up -- I think of it as doing the half of the sequence which would have occurred had those first stitches had other stitches in front of them. You're starting in the middle of the sequence.
Put the tapestry needle through the first stitch on the front needle purlwise, and pull through, leaving the stitch on the needle.
Then, put the tapestry needle through the first stitch of the back needle knitwise, and pull through, leaving the stitch on the needle.
And now, you're ready to get your Kitchener rhythm mojo going, by following these four steps.
Put the tapestry needle through the first stitch on the front needle knitwise and pull through, removing the stitch from the knitting needle.
Put the tapestry needle through the next stitch on the front knitting needle purlwise and pull through, leaving the stitch on the needle.
Put the tapestry needle through the first stitch on the back needle purlwise and pull through, removing the stitch from the knitting needle.
Put the tapestry needle through the next stitch on the back needle knitwise and pull through, leaving the stitch on the needle.
When I've got my Kitchener rhythm mojo going, I'll be chanting in my head "knit slip, purl purl slip, knit knit slip, purl purl slip, knit knit slip" -- it's all in the rhythm.
Also, don't be in a hurry to tighten up the tension; do a few stitches then adjust the tension to be even with the rest of the border.
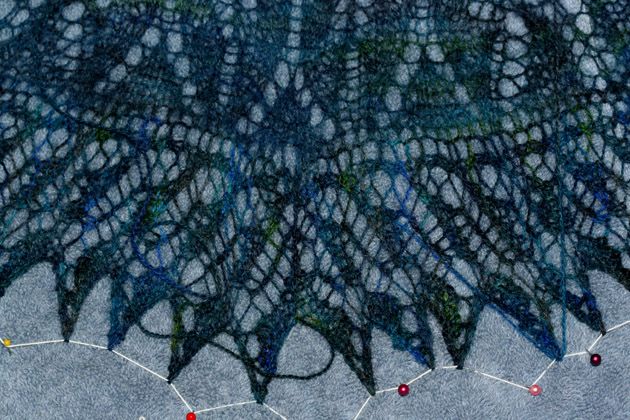
 Finally -- yes, finally! -- comes blocking. In the photos you'll notice that I've threaded the edges of the shawl with crochet thread. I really like this method because it let's you make incremental changes without having to reposition everything, but it's more flexible for oddly-shaped items -- like a faroese shawl -- than blocking wires (not that I can every find my blocking wires).
To use this method, starting at one corner pass the blocking thread (make sure it's strong -- as it's going to have quite a bit of tension on it) through each point going the same direction -- it doesn't matter if it's down or up, as long as it's not alternately up and down.
Make sure you leave yourself enough thread to accommodate the stretch of the shawl -- I just leave the far end attached to the ball of crochet thread, and pull a hefty length all the way through to the other end.
Then, when you start to spread out the shawl, anchor the loose end of the thread, and pull the shawl out along the length of the thread. When you get to a corner, pin down the corner of the shawl and anchor the thread; this is temporary, to gives you a guesstimate of how much thread you need. Do the same on the remaining sides (although with faroese, there's really only the two bottom corners, and a long curve for the front/sides).
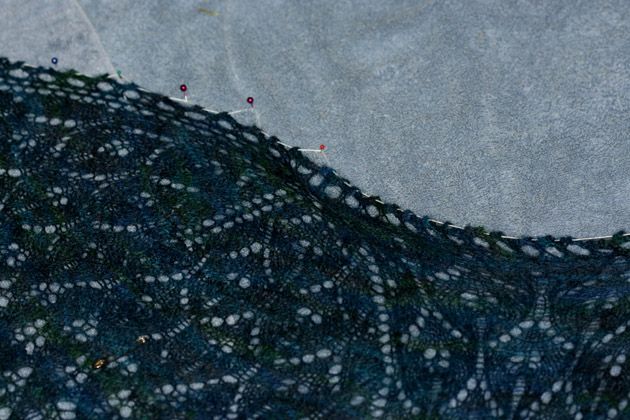
Once you have your thread length estimate, leave a few inches more, just in case, and start shaping the shawl. I worked it by pinning down the center neck and the ends of the neck band, and finding the center bottom and lining that up. You can then moving along the edges of the shawl pulling on the crochet thread and putting in anchor pins, to gradually stretch the shawl into it's full dimensions -- adjusting the placement of the points if needed by sliding them along the thread.
When everything was laid out and stretched, I released the tension of the crochet thread along the neckband, which gave me a nice curve along the middle of the top edge.
§ § § § §
So that's the end of the Irtfa'a shawl.
It was pretty fun to knit, even if the pattern had some... issues. My mother-in-law will likely receive her package within a couple of days, so we'll see how she likes it.
