
What Are You Working On is a community diary series for all things crafty and artsy, in a variety of mediums and techniques.
You may volunteer to guest host by joining this yahoo group, which jlms qkw checks from time to time. Also by joining this group, you will receive one email a week when the diary is posted. You may also volunteer to host by posting a comment in this diary.
If you click on the WAYWO group, there is a box for the group about 4 boxes down on the right hand side. If you click on the heart in this box, you will "follow" this group and the diary will appear in your "stream."
It's summer, the kids are out of school and while it's time to relax and do nothing, I do like to do different projects with the kids. Let's face it though, telling a 12 year old boy that you want to "do crafts" with him is not met with much enthusiasm, so of course I try and find things that will hold his interest. Lego's, Star Wars, Nerf, and Harry Potter are some of the things that he is interested in.
When it comes to Potter, his main interest lies with the wands.

Of course you can buy wands, and while they are very cool, they are also very pricey. He has a couple and and really likes them, but two wands are not enough!

You can also carve wands from sticks. I have to say that I thought it was really cool to watch him sit on the patio one afternoon crafting every stick he could find into a wand. The twisty one is my personal favorite.
These are awesome too, but are pretty quick and unless you get a rockin' stick like the curvy one they all start to look the same.
Low and behold, what did I see on Pinterest one day?? DIY Harry Potter Wands!!
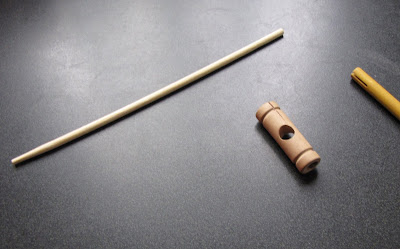
These are cool, super easy, and fun to make! Here is our version of the tutorial in the link. All you need is a chopstick, a glue gun with an ample supply of sticks (I think we used 6), some beads, and paint.
We started with a basic chopstick, and since it was so small and Elliot wanted a bigger handle we bulked it up with 2 Tinker Toy bits.
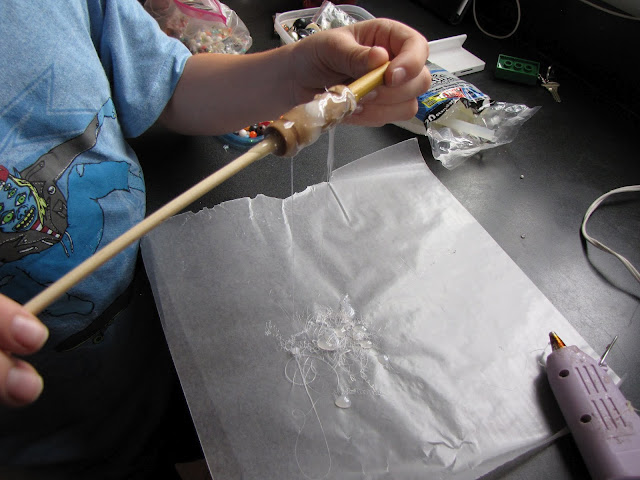
Here he is gluing the chopstick into the Tinker Toy:

Once that dried, we started adding more glue to build up the handle. At first I was holding it since the glue is so hot and it was a smaller area we were working with.

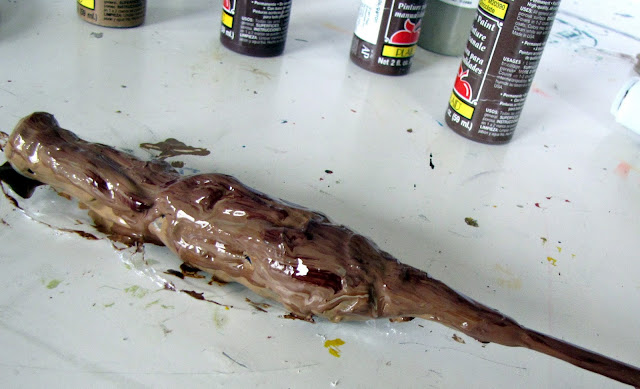
We just kept piling the glue on and manipulating it until he was happy with the results. Gravity is your friend in this process!
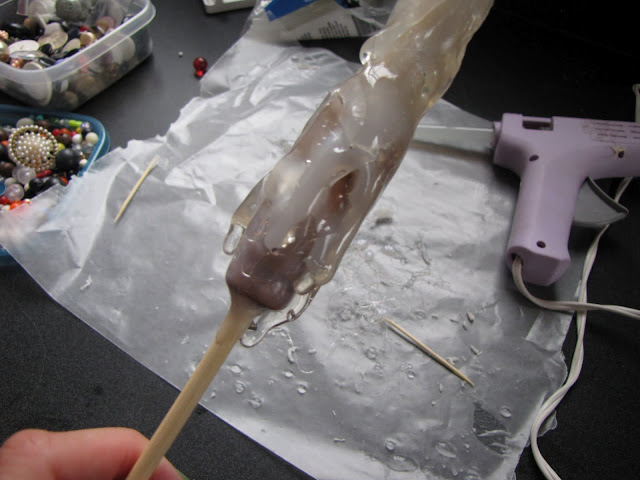
Here is the completed wand, you can see he did add one bead at the tip for shape.

Next came my favorite part, when the wand really comes to life. Paint! We have lots of acrylic paints already, and luckily had a few browns to work with.

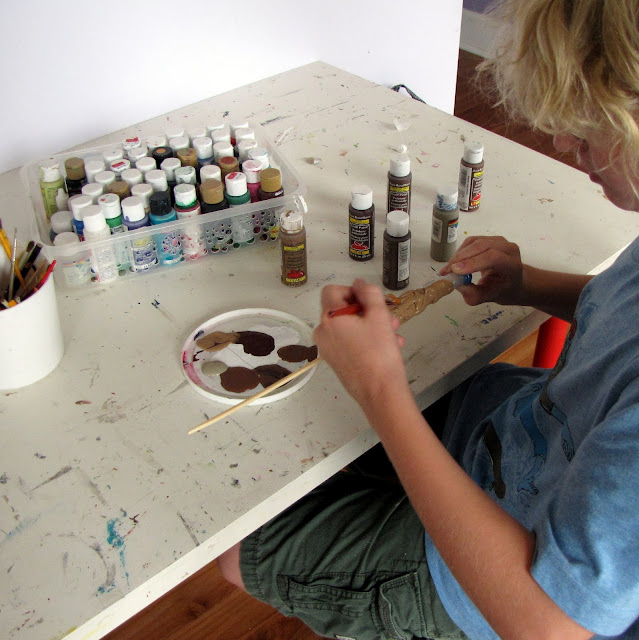
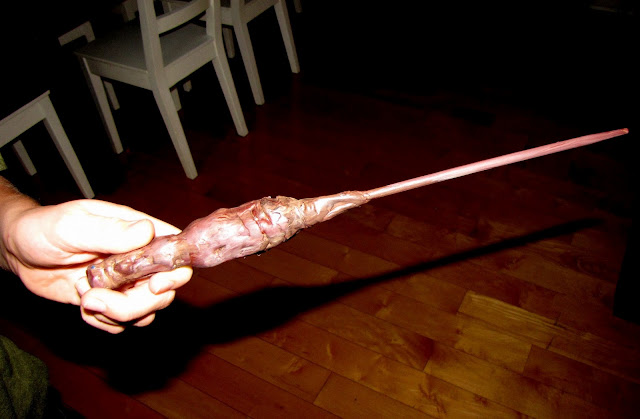
Ta da!! I mean, Expecto Patronum!! Or something like that. ;)
So what are you working on?
