So many of you have sent me your appreciative comments on all these outdoors oriented missives I’ve been tapping out on the keyboard (including a trilogy of same on the Colorado Plateau territory starting this weekend). And some of you have shared your thoughts and exuberance about hiking, backpacking or camping out in the desert Southwest, particularly its myriad national parks and monuments. There was even one email in particular that really got my attention, where the commentator wrote words to the effect she would love to venture into the backcountry and get away from the swarms of campers. . .if only she knew how to backpack. I take it she meant she didn’t know too much, if anything, about backpacking, though she did tell me she was a hellava hiker in her day.
That being said I am not sure if this diary’s posting may be of interest to the bulk of the community, and like I have been doing all along. . .I will wing it and post the following information, just because. I also feel I want to do something for this supportive community by sharing background information that has been a privilege to teach and share with many others over quite a few decades. Hence, the substance behind the title of this spontaneous diary.
Feel free to use and share this information any way you like. . .for yourself, your family, friends, maybe even suggest it to your in-laws you may want to encourage to get out there somewhere (thus engendering less tension in your household for a while). The following information sets its focus on backpacking compared to hiking with a daypack. However, there is cross-information that can apply to both aspects of hiking. The main difference is where backpacking treks entail overnight stays for X amount of days and nights.
Please note: Although I have experience as a mountaineer, most of my backpacking treks have been throughout the Colorado Plateau Province. Hence, the majority of these hikes entail canyon-desert topography. The following generic information also sets its primary focus on backpacking in my other office, the Grand Canyon, but can be adapted to other terrain. Thus treks in the mountains or deserts sans canyons or valleys. Wherever.
P. S. Most of this diary entails a list of items. Hence, not everything needs to be read or studied. Maybe considered, but not plowing through the presentation itself. (continues after the thig-m-jig)

I Call It The “Art Of Backpacking”: The weight and select items you tote around in your backpack is always critical and must be considered based on the number of days you will be trekking, as well as what you need to have with you (before you embark on the trip). However, when it comes to backpacking comfort and enjoyment vs. the agony and (potential) defeat, sometimes the solution can be found in a BALANCED backpack compared to the exact opposite. Simply put: when hiking with a backpack, and knowing how and when to tighten or loosen straps to ease physical tension and demands upon your body, such tips can make any journey easier, more comfortable.
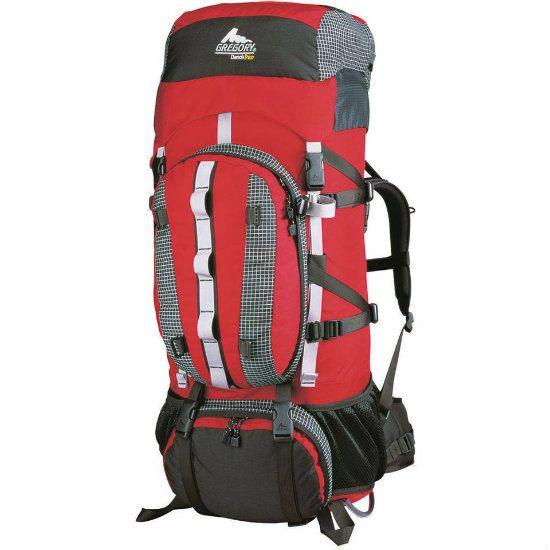
The nitty-gritty about backpacks comes down to this main point: some are more sophisticated than others and any decent backpack should at least have a waist strap for shifting the load from the shoulders to the hips. A padded waist strap is always ideal. The pack should also fit the hiker relative to his or her size. If you do not know what a decent pack is, or how it should fit your body, the best advice is to shop around and get as much information as you can. Borrowed gear from anyone is not always a good idea, simply because you may be fitted with something you really don't want or need. Renting gear from a professional outfitter is the best advice for novice backpackers. This way you can try on different packs for different terrain and gain valuable experience and knowledge before you decide what's right for you. I want to also mention backpacks come in to types of frames: external and internal. Some hikers prefer one or the other, while some, like me, have both in one’s equipment arsenal. Generally, internal frames are adapted to carrying more items and weight, while external frames are larger and can get caught on tree branches or even rock ledges (especially when climbing or hiking in thick brush and tree branch country). Remember: this is a general complaint or favoring of one over the other type of frame.
The essence of this art entails making the backpack work for you and not the other way around. True, experience teaches you this art. But to borrow an old and reliable phrase from the Scouts: ALWAYS BE PREPARED! Also, know how to use your gear as though your comfort, if not your life, depends on it.
Equipment List & Hiker Notes: Here is a typical “corridor” checklist I offered to both clients (my former ecotourism company) and students (mainly, those assigned to me by the Grand Canyon Field Institute), as well as outings I led for the likes of Yavapai College (Prescott, Arizona) and Northern Arizona University (Flagstaff). The purpose of this or any other backpacking equipment list helped prepare individuals for the treks and adventure. Being prepared also entailed knowing what to do, as well as having the right equipment, food, and supplies planned for any outing. Thus the following list cuts to the chase and puts the information in the hands (and back) of the adventurer (as it were). The added benefit was how this learning and experience would better prepare the individual for future trips, each time building on the experience by making every trek less stressful based on sound organization and planning.
Hup 2, 3, 4, Hup, 2, 3 4: Let’s begin with the obvious––training. Getting in shape for the physical demands of hiking is imperative. Training also entails the type of topography and terrain you can expect wherever you plan to go. When backpacking in the Grand Canyon, indeed all canyon country throughout the Southwest, there is a noticeable difference compared to, say, mountain trekking or relatively flat terrain (open desert country, for instance). In short, when hiking into the canyon country from the rim it’s all downhill to begin with. Duh! This initial segment of the trip will therefore be a knee-jarring descent and one’s toes jammed into the front of the boot is not exactly a good sensation. The backpack is also at its heaviest. When it’s time to turn back and head the other way, the climb out will affect other muscles. The legs are also more fatigued based on how much hiking was entailed getting to this point. (I’ll have more to say about this later in this diary.)
There are other aspects of hiking here that must be factored in, as well. Namely, the altitude. The South Rim’s average elevation is around 7,000 feet above sea level and the North Rim is 8,000 feet (and goes as high as 8,900 feet. Thus the air is rarefied. Traipsing into the canyon the hiker may not be aware of just how thin the air is, while on the way out the lungs will feel like they’re burning, just as leg muscles typically seem to scream for oxygen.
The next aspect to consider is the temperature extreme. It may be a balmy day (temperature wise) at the rim, say, around 70 degrees (Fahrenheit), but the deeper into the canyon you go it gets warmer and drier. Indeed, at the bottom of the Grand Canyon it likely will be an additional 30 degrees (and that’s not counting additional heat radiating from the rocks). It’s also drier, because that’s the way things work inside this mile-deep chasm.
All of which is not to scare you off. Instead, my advice is to be prudent about where they plan to hike. Do the homework and consider all coincidental aspects of the hike, not just food, clothing and backpacking gear. Well, that and sometimes listening to the students when they tell me to stop talking so much and run. . .
Again using the Grand Canyon’s turf as a prime example of what has to be the most demanding hiking anywhere on the planet, there are advantages for backpackers that diminishes such demands. For instance, when preparing for the challenge consider the total distance of the hike while carrying an anticipated lighter weight that will be easier to tote for, say, a 5-day hike (28 - 38 pounds in most cases). Next, consider the total elevation gain/loss (one vertical mile each way for rim-to-river hikes). Finally, having an awareness of environmental conditions likely to encounter (see temperature & precipitation chart below).
Thus training, preparation and awareness is the pivotal trinity to keep in mind before you take that first step (into the canyon or wherever you plan to hike and backpack). What kind of training? Running is, of course, one of the best training exercises for those who can handle it. So is skipping rope. Fast-walking is another means and less impacting on the knees. Bicycling is, for some like me, even less taxing on the knees. Working out in the gym is also recommended. All of these exercises will strengthen key muscles you will be relying upon the most. Consider, also, a combination of these and other exercises, including swimming. When possible, wear the backpack (with the approximate weight you’ll be carrying) and take a long walk somewhere, merely to get used to the weight, feel and balance.
Remember: Wherever you plan to hike and backpack you must consider the elements and the season. Summer hiking in the canyon country guarantees excessively high temperature extremes. Because the climate is typically arid and tepid (and often simmering), drinking more water than usual will be necessary. Thus more necessary weight to tote in the backpack. Even so-called “corridor trails” (i.e., sometimes called highways because they’re wide enough for mules and typically uncluttered, making footing easier) can be demanding for some hikers. By demanding, I refer to the steepness of the terrain in some segments of the trail. Backcountry trails, however, are generally rocky, convoluted and steep, requiring not only physical agility, but also astute topographical map and compass skills (in most cases). In short, hikers must factor in the difficulty of the terrain, as well as all the rest that’s entailed when hiking in canyon country.
Having A Proper Frame Of Mind: A successful hike can depend as much on your frame of mind as one’s muscle tone and physical prowess. Ergo, pack your positive thinking and attitude and be sure to bring along a sense of humor (trust me, levity helps in some situations).
Another tip to pass along is not to be preoccupied with the mileage. Hence, the distance you’ll cover on any segment of the hike. Instead, take the trip one step at a time; savoring each phase by breaking up the distance, say, the anticipated time to the next rest spot or lunch or trail’s end for the day (then setting up camp). In short, wherever you go, that’s where you are. Be in the moment and avoid borrowing trouble from the future. (Sometimes it's necessary to reflect on this before getting the point.)
Suggested Hiking Apparel: With a typical 30 or so degree temperature differential from rim to river (speaking, again, for the Grand Canyon hiking experience), wearing appropriate clothing is critical. Thus knowing what to wear and why one fabric and design is better than another. Typically, wearing jeans in everyday life is comfortable, though it’s plainly not the type of fabric and apparel you want to hike in, because the material promotes chafing. And chafing is one of the big no-no’s when hiking. Blisters is the other nag to avoid.
The following ten items are therefore highly recommended:
1. Sturdy hiking boots which are well broken-in (buy them one-size larger than your street shoes to allow for swelling, thick socks; also, spare shoelaces especially if the old ones look worn
2. Brimmed hat and bandanna
3. T-shirt and long sleeve shirt for protection from the sun
4. Underwear
5. Shorts
6. Long pants such as leggings or lightweight trousers to block sun and give warmth at night
7. Warm top such as a sweater or fleece jacket
8. Hiking socks (padded)
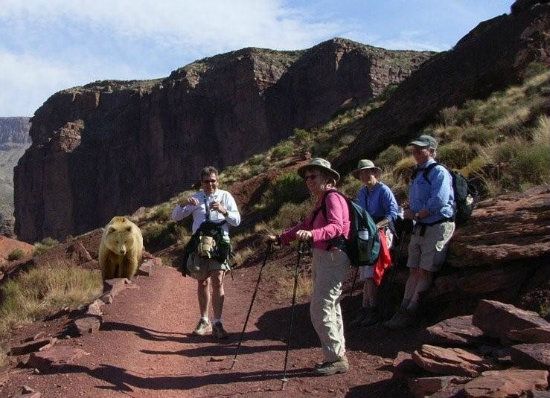
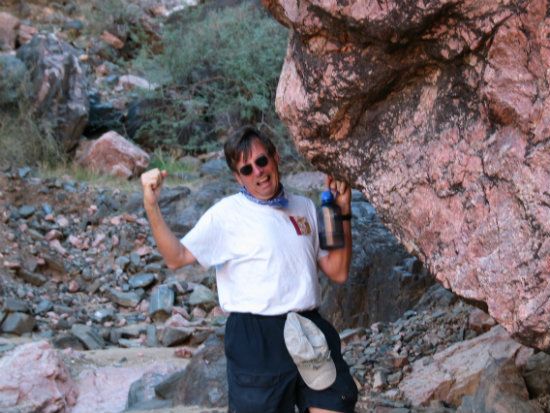
This advice also applies for casual day hiking and I'm thinking this pose shows just how casual and fun hiking can be. . .

Note: Most experienced hikers know that wearing thin liner sock under one’s hiking socks is highly recommended such as polypropylene socks. Most important, DO NOT WEAR COTTON SOCKS! Period. Actually, cotton anything is deemed non grata hiking apparel.
9. Rain shell, Gortex jacket, or poncho
10.Sport water sandals i.e., Merrills or Tevas for creek crossings and camp comfort
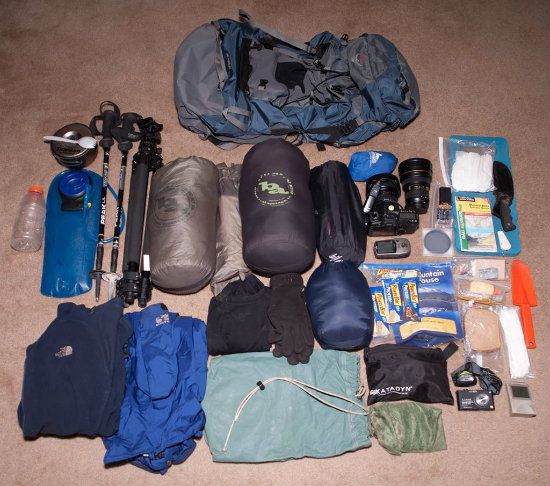
Equipment And Equipment List (Suggestions): The less weight you carry the easier the trip. Thus it’s prudent to think of ways to make items do double duty. Share items with others in your group (if going with a group). For instance, stoves and fuel, reading material,First-aid kits, and anything else that tends to get replicated in one’s backpacking contents. Another idea is to cut back on unnecessary "stuff." For instance, do you really need that telescope for star-gazing or your favorite pillow or a CD-player or. . .fill in a long list of options you typically prefer having when you’re not required to carry such.
But here is a list of items you do need to tote and consider packing for the trip:
• Backpack with padded waist belt, padded shoulder straps and a decent suspension system which will shift weight to hips (internal or external frame)
Note: Beware of borrowing a pack from someone not your size
• Lightweight sleeping bag. (Some trips that camp at higher elevations need warmer bags. Trip description will contain this information.)
• Closed-cell foam pad or lightweight self-inflating mattress (i.e., Thermarest or similar) to insulate you from the ground (this item is important for your bodily comfort in any season)
• Ground cloth to put under sleeping bag and pad. Can use poncho, nylon tarp or lightweight plastic sheet
• Tent* - lightweight backpacking (or tube-tent style). Make sure tent poles are functional and the stakes and fly are included
• Fanny pack or lightweight day pack for trips with side hikes
• Water bottles or tubed hydration bladders (i.e., Camelback or similar) — generally you will need one gallon (at least 4 liters) of carrying capacity (if you are using bottles rather than a Camelback then a waist belt bottle holder is important for easy access to water while hiking
• Lightweight backpacking stoves*, fuel (1 container is usually sufficient), lighters
• Plastic cup, bowl & utensils
• Stuff sacks for hanging food (hanging items from trees is prohibited).
• Plastic bags for storing items, carrying trash, and packing out toilet paper (i.e., small Ziplocs that are then stored in a larger Ziploc)
• Toilet articles and wash cloth (bandanna can double as towel and/or wash cloth); also moist towelettes for personal hygiene when you can't shower or wash up (and remember to take your dental stuff)
• Sunscreen, lip balm and sunglasses (and spare regular glasses/contacts if you use them
• First-aid kit* — or at least the following items:
a. Prescription medicine(s) — please inform instructor of any medications you are taking
b. Ibuprofen, or some other anti-inflammatory drug to help with inflamed joints.
c. Ace bandage(s)
d. Dr. Scholls brand Moleskin, a self-stick pad which cuts to size to prevent blisters.
But good ole DUCT TAPE also works wonders (as long as you're only bothered with "hot spots" and no open wounds)
• Walking stick (strongly recommended), knee brace, etc. (if needed).
• Flashlight (small, light weight using AA or AAA batteries) or headlamp with extra batteries/bulb (a headlamp will free hands for nocturnal activities)
• Pocketknife (i.e., Swiss Army style, Letherman, etc.)
• Money in the event you plan on making purchases (if there are cantinas and such, like Phantom Ranch at the bottom of the canyon)
• Candle lantern* (optional).
• Notebook, drawing supplies or paperback books if desired
• Guide books* (optional)
• Maps* (optional)
• Insect repellent (though less a need in dry canyon terrain)
• Duct tape;* can be adhered to walking stick surface and removed if necessary (a small wad of bailing wire also works miracles for emergency repairs and both are optional)
• Sewing/repair kit* (optional)
• No-see-um netting for tents* (optional-nice)
• Related reading material/field guide books* (optional)
• Emergency water treatment tablets* (optional)
• Emergency water filter* (optional)
• Spare TP* (optional)
• Mirror; whistle* (optional)
• Spare bungee cords/straps* (optional)
• Watch/compass* (optional)
• GPS* (definitely optional)
• Can you think of anything else to add to this list?
* Denotes items that may be shared amongst the class to reduce total weight.

Yummies For The Tummies: Food is every bit as important as water for maintaining a proper electrolyte balance and avoiding dehydration and other heat-related ailments. On the other hand and foot, you want to pack as lightly as possible. Hence, it’s a good idea to repack food to avoid carrying extra packaging keeping in mind that everything you pack in you must also pack out. The following are a few food suggestions and ideas for meals along with a number of proven food planning tips:
• Choose foods that require only a short cooking time - 5 minutes or less is best. This will allow you to carry less fuel. Oatmeal and other hot cereals make excellent breakfasts and just take a small amount of boiling water. Most hot cereals come in quick-cooking forms. Granola with reconstituted dry milk provides some welcome "crunch" as well.
• Salty foods are much more appetizing than sweets while hiking and are critical in keeping your sodium level where it needs to be as you exert yourself in a desert environment. Taking a few sweets along is o.k. for an occasional treat but crackers, pretzels, and peanuts should be consumed frequently throughout your hike. As for sweets its best to strive for crunch, flavor and texture. Gingersnaps, peanut butter cookies, animal crackers and cheese and peanut butter cracker sandwiches are some good choices. Try to get things that won't crumble under the rough treatment of backpacking.
• Backpacking food in general is mushy and bland so try to add crispy, spicy things to your meals. Take a small amount of your favorite spices in a Ziploc bag and add it to your pasta and other prepared dishes.
• Be creative! For those who like Mexican food (such as is vogue throughout the Southwest), there is a new item out in the grocery stores. Instant refried beans made by Mexicali Rose out of El Paso are lightweight, delicious, inexpensive and one package makes two hearty dinners with flour tortillas and a little hot sauce. Keep an eye out for sauce mixes as well, to jazz up a dish of angel hair pasta.
• Avoid cans of food. Not only are they extremely heavy, but the cans smell and can attract unwanted critters to the empties stored in your pack. If you do decide to bring a can or two of tuna or white chicken, please bring the smallest size possible.
• Fresh fruit is poorly suited to backpacking as it quickly becomes bruised and mealy in the heat. Dried fruit is much more sensible and appetizing in the long run but requires that you drink plenty of water as your body needs to reconstitute the fruit to digest it.
• Other items that always seem to sound good are beef jerky, salami and cheese. They might be fine for dinner after you're done hiking for the day, but all of these items are very hard to digest and can just sit like a lump in your stomach while hiking. Stick to easy-to-digest food high in carbohydrates for the daytime. Don't bring anything that must be cooked for lunch since you most likely will be on the trail.
• Avoid drinks with caffeine whenever possible. They have diuretic properties and will speed up the dehydration process.
Suggestions For Meals: You probably already know what you want to eat on the backpacking trip, yet some of what you will have to prepare is simply not possible. Some items may also be too darn heavy to tote. Thus you have to improvise. The following suggestions for all three meals is what most backpackers endorse for nourishment.
Breaky: cereal, granola, instant or fast-cooking oatmeal or other hot cereal, powdered milk, hot chocolate, granola bars, breakfast bars. Bagels are wonderful with cream cheese or peanut butter, but they do mold quickly in the heat. If you wish to carry them they should be consumed in the first day or two.
Lunchy: peanut butter, crackers, tortillas, pita bread, trail mix, gingersnaps and other crunchy cookies, cracker sandwiches, granola.
Din-Din: quick-cooking rice or pasta dishes or refried beans and appropriate spices.
Beverages: drink crystals, hot chocolate, and powdered electrolyte replacement drinks like Gatorade or Gookinade. (Beer, wine and whiskey? Not advised. Use common sense and the clue in the advise will make more sense.)
FYI: The following are several Grand Canyon National Park regulations of interest (and the same for most national parks and monuments when hiking in the canyon country. And let me also say these following rules are non negotiable.
• Wood or charcoal fires are STRICTLY prohibited!
• You must carry out ALL trash, including toilet paper!
• Firearms, bows and arrows are STRICTLY prohibited!
• Pets are prohibited below the rim (the park has kennel space available for a fee)!
• Removing or disturbing plants, rocks, animals, minerals, archeological or cultural resources is prohibited (practice "low impact" backpacking)!
• Fishing requires a valid fishing license or non-resident permit!
To Rent Or Purchase Equipment: You may be curious about backpacking and wanting to get into the activity by buying everything that’s necessary. Then again, you may be more conservative and considering renting some or all of the gear. That being said the following items are the kind of equipment some retail outlets rent (such as REI). Because prices vary from region to region, consult the outfitter first before renting. Also, equipment is less expensive for multiple days than by the day:
• Daypacks (varying sizes)
• External frame backpack
• Alcohol stove w/ fuel and cook set
• Butane stove (no fuel/cook set)
• Butane lantern w/ mantles (no fuel)
• Sleeping bag (three season)
• Sleeping bag (summer)
• Foam pad (closed cell)
• Gortex bivy cover
• tent (2, 3, 4-person)
• Rain jacket or poncho
• Hiking staff (adjustable, like ski poles)
• Propane Lantern w/ mantles (no fuel)
• Propane stove 2 burners (no fuel)
• Instep ice crampons w/straps
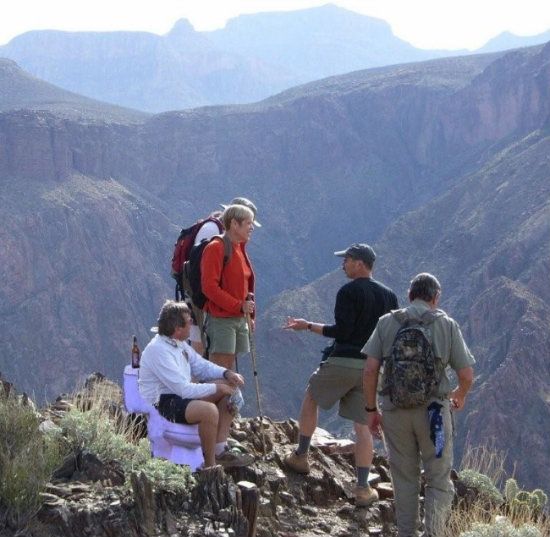
My Personal Hiker and Backpacker Tips: Just in case some of you may want to know even more about this overall subject matter consider the following advice from someone who sits down on the job, when teaching:
While the previous information pretty much covers what you'll ever need to know when hiking and backpacking (while making adjustments for the place and terrain you will experience), the following musings are intended to make any backpacking trek safe, enjoyable, and help remember what you should have brought with you in the first place. When considering backpacking as a journey where you carry everything that's essential to your well-being, it never hurts to learn a few more tips from other sources. I have personally found out the hard way on quite a few occasions. There is also the aforementioned art to backpacking, whose salient advice demonstrates how there really are ways to make any backpacking trip easier and more enjoyable.
First, let me ask the obvious: Do you remember when your parents were sometimes telling (or even yelling at) you to do this or do that? And so you looked at them and maybe said, “Yes.” Secretly, however, you kept your private thoughts to yourself. In short, sometimes you listened; at other times you experimented with the axiom: Question authority! Well, the following information isn't exactly along those same lines. Still, if you want to make your journey into the Grand Canyon a safe and relatively comfortable one, I'd suggest you keep the following salient points in mind.
As a long time trail tramp and experienced backpacking guide, I have come to rely and trust the do's and don'ts kind of information I impart to others. Occasionally, I have messed up and fortunately lucked out. Thus I chalked it up to a valuable experience and something to prevent in the future. Sometimes the mind tends to play tricks on you and if in a tight situation you definitely want your mind clear and able to think through whatever you’re facing. Also, attitude should be optimum. Hence, a poor attitude tends to add stress and complaint. So don’t. As mentioned, be aware of how far the trek is for any segment, yet focus only on the time––not the distance. Consult the map, always and know where you are going and how far you must travel. Thus it is so many hours to X rather than the mileage it takes getting there. Another tip is breaking down the mileage. For instance, you will be hiking for 9 miles, and so you break the length into three segments, but adjusting a time factor, say, an average pace when hiking one mile is around forty-five minutes. So, in about an hour and a half you will have hiked about three miles.
Speaking of maps (topographical) when hiking in the backcountry, don't ever leave home without one when exploring any backcountry anywhere!
Keep in mind the desert Southwest’s canyon terrain denotes an arid climate. Here at the Grand Canyon it literally is an upside down mountain of tortuous trails, whereby mileage to any point is always deceptive. Even the change in altitude can be a problem, to say nothing of the severity of incline one faces on most switchbacks. The potential dangers of heat stroke or heat prostration, dehydration, even hypothermia, exist here like no other place. If you ever get nailed by a scorpion or so-called vaccinated by a snake (rare in most cases), there are proper remedies if, and when, the situation comes up. By the way, panic, physical activity and retribution are not part of the plan to get you back on your feet and underway. Then again, if you pay close attention to what you're doing, if you're careful about how you go about backpacking procedures when hiking in the Grand Canyon, chances are you will have one of the most memorable and safe treks of a lifetime.
(May I add to such potentially worrisome news that you really should know something about First Aid when hiking. As an EMT, I get to play doctor (when leading trips and when necessary). For solo hiking, you must considering playing the same role. When hiking in groups, always elect the most qualified member for this role. Thus there is a leader and there is a medical officer of sorts.)
For many hikers, it is usually a lot tougher hiking out than it is going in. (As I mentioned before, I prefer climbing out because my legs and feet aren’t taking the brunt of the work compared to going down the trail. It’s a subjective call either way.) Anyway, if you have difficulties with normal breathing (i.e., emphysema- and asthma-type illnesses), if you have doubts, fears or trouble with heights, if you have difficulty breathing trail dust, if you have difficulty with fragile bones, sore leg or calf muscles, including your thighs, then you might reconsider what you're getting into before you let your appetite of imagination and daring go to work for you. About the only real nuisance you will face is how to keep the canyon critters from ripping you off as well as destroying your gear in order to get what they want. Notably, the ubiquitous daytime ravens and squirrels and the nocturnal mice and ringtail cats. They abound in any site you choose to eat, rest, or sleep and have been at their trade and antics a lot longer than you have yours. Trust my experience when I say these creatures have no reticence or concern when it comes to your supposedly impregnable gear. Invariably, they will win and you will be out some food supplies. Sometimes your gear will even be destroyed in the process. There are ways to prevent such spoils from happening, however.
My Most Salient Advice For Hiking: The following rules are not listed in any prioritized order. The reason is ALL OF THEM ARE IMPORTANT. Forgetting any one of these reminders can sometimes be the difference between injury, illness or even death. Please read and (maybe) memorize:
1. KNOW YOUR LIMITATIONS, TRUST YOUR KARMA, and ALWAYS GO PREPARED — for practically anything. Emergency medical evacs from the canyon cost a lot more money than most people earn in two months. The rule of thumb here is: When it's your fault, you pay!
2. Pack your gear and supplies for the amount of days and nights for the journey plus one extra day of spare rations.
3. Be sure to have all necessary meds and herbs along before you go. These items will do you no good if you leave them in your car.
4. Have necessary permits for all overnight camping. Contact the Backcountry Office at the canyon for dates and availability of trails and campsites. Allow plenty of time for advance reservations; some trails and campsites are booked months in advance.
5. Pay your health insurance (you never know) and make sure your friends and family know where you're going and when you expect to be back (just in case).
6. Put all food into zip-lock bags and/or containers. The more ways you can disguise the food you are carrying, the less the critters will bother you.
7. ALWAYS HANG YOUR PACK off the ground. You may need extra nylon rope for emergencies. Packs and gear lying on the ground are an open invitation for a critter heist. Ravens are quite adept at working zippers on a backpack. Actually, they're that good and sneaky. Believe it!
8. An ideal weight for a 3-2 (i.e., three days, two nights) is about 35 pounds; for a 4-3 about 40 pounds. Add more weight with extra water if some of the camp sites are dry (i.e., no water).
9. When dry camping, consider foods that do not require too much water to cook or clean afterwards.
10. ALWAYS TREAT DRINKING WATER (with water tablets or a water filter) when in the backcountry or along any trail.
11. ALWAYS dig a latrine at least 50 feet from any body of water, preferably about 6 inches below the ground. Bury only solids: carry out yukky paper waste.
12. ALWAYS let someone in camp know where you're going, even if you're going to do personal business or go off somewhere for meditation or prayer or solitude.
13. NEVER CAMP IN STREAM or CREEK BEDS or DRAINAGES of any kind.
14. TEST old and new gear (especially packs and tents and blow-up type mattresses) before leaving. ALWAYS.
15. Yield to hikers coming up the trail; also stand quietly when mules are passing in either direction. (You won't have these beasts of burden to deal with in all backcountry trails, promise.)
16. There's usually something that's left unsaid or is missing. Determine what it is and fill in the blanks.
A Final Checklist: Before leaving on any backpacking expedition it is further advised that you go through a checklist of what you plan to take along. For example, a list of clothing articles worn and packed; sleeping gear; shelter; kitchen; basic tools and utensils; consumables; liquid(s); haulage for trash, etc., emergency; repair; and personal. If you are traveling in a group compare with the others and try not to duplicate items that can be shared. I strongly suggest you do this final check procedure at least two nights before you leave for your trip. That way if something's missing you still have time to purchase it. When traveling in groups, remember some unnecessary weight can be left behind. In this case, draw up two separate backpacking lists: one for your individual must have needs, and the other for group shared items.
Next, think of your backpack as your home away from home; it's also your portable office, your food store, your medicine cabinet, your supplies for everything you'll ever need on any trail. Take along only what you absolutely need. Always plan your gear for the following contingencies:
• the number of days and nights you plan to be gone (plus one or two days);
• the season (i.e., the usual type of weather and sometimes the not-so- usual); and
• the kind of terrain you're headed into.
For canyon terrain hiking in this part of the world where I live you must prepare for a rigorous desert terrain of fairly steep switchbacks that involve a lot of altitude change either way. Do not be fooled by auspicious, warm, sunny days when leaving the rim. It can, and often does, get close to Hades (temperature-wise) in the inner canyon sector. In places, shade is also minimal. Sometimes there isn't water for a long way and you have to pack extra water just to keep going (a quart of water also weighs about two pounds). The weather can also turn quickly on you. If you are traveling in a group split up the First-Aid kit and similar materials. Two First-Aid kits per group are recommended. Hikers must also carry their own prescriptions, meds or preferred herbs to deal with whatever ails them, or if such items are taken for preventative or healthful measures.
Once you know the number of days and nights you will be traveling, sort the following gear out the night before you leave home and make sure everything is in front of you. Then pack the gear, keeping in mind the more balanced your pack, the better balance you will have on or off the trail. (Pack the heaviest gear at the bottom of your pack.) Keep close at hand those items you might need more often or in case of an emergency (i.e., poncho, water, trail snacks/refreshments — trail mix/gorp, etc.).
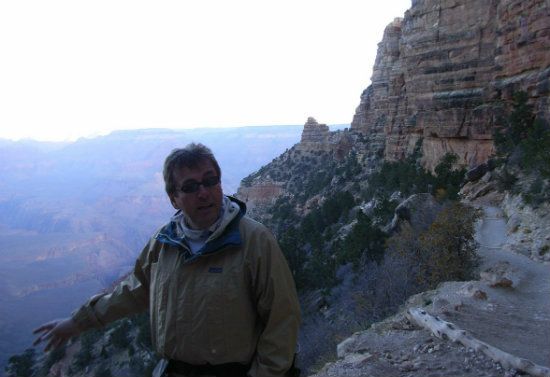
So, who among you are up for hike? If so, pay attention to the advice of getting in shape (training) and maybe even building muscle tone like this strong dude (not):
In Conclusion: I hope the community finds some of this gabby presentation useful. Again, tailor the information to the type of terrain, weather, extreme of trail conditions (if applicable), and available water, then act accordingly. I can also say here in the Grand Canyon country hiking is arguably some of the most challenging terrain for most hikers, even the so-called “highways” (such as hiking the Bright Angel or South Kaibab trails). Bear in mind any hike in any terrain and environment can be made more difficult than it need be if the hiker is not properly prepared in all ways. Thus my reliance on the adage ATTITUDE IS GRATITUDE! Also, having the right equipment and the recommended items in one’s backpack can and will make any hike easier, better.
Happy trails wherever you wonder and wander! And this is how and where all this fun and exercise starting for me (my first Grand Canyon trip in 1970):
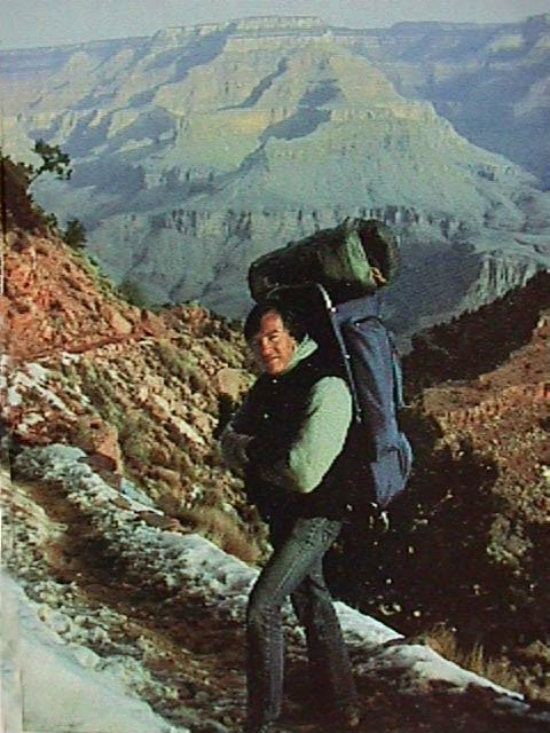
And thousands of miles later I'm still on this side of the grass and breathing. Glad that you are, too.
Rich
