A few weeks ago, I contributed a comment to the WAYWO thread, and fell into a brief but friendly email exchange with emeraldmaiden because I mentioned blacksmithing. She was kind enough to suggest a diary on the subject instead of tucking it into what was essentially a fiber arts get-together. More recently, I sent her a draft of this entry, and she kindly offered to let me host this week. I'm really flattered.
Smithing is kind of like the story about the blind men and the elephant, because what it is depends on your point of view. There are farriers (horse shoeing specialists), artist and ornamental blacksmiths, knife makers, re-enactors and demonstration smiths, folk art schools, hobby smiths, and tool makers, just to name a few. Last time I tried to write about smithing, I got bogged down in the practical details—safety warnings, how to find a forge and anvil, and how to manage a coal fire. This time I want to do more of an essay about the magic and mysticism of iron work.
Ironworking in religion and mythology
The term "black arts" has come to mean Harry Potter style magic, but where did the concept come from? It has a lot to do with making tools out of the basic elements found in the earth. In a word, blacksmithing--

The devil of Christianity is reputed to live in a realm of fire, brimstone, smoke, and intolerable heat. He lives in darkness, deep in the ground, is glowing red, and he carries an iron fork with three barbed tines. Do any of these symbols seem familiar? Captain Ahab invoked a curse upon the white whale when he had the Pequod's blacksmith forge a harpoon head from horseshoe nails and straight razors, then heat treated the steel by quenching it in the blood of the pagan harpooners. Samurai swords were the steel soul of the samurai, and even today, the Christian God is said to smite sinners, just as Thor might have smashed mortals with his hammer, or Zeus might have tossed a lightning bolt that he forged on his celestial anvil.
The origin of iron
It comes from stars. The end product of all the nuclear disintegration in the universe is that the other elements are trying to turn into iron. Lighter elements like hydrogen tend to fuse into heavier ones. Heavier elements slowly decay. But iron does neither—it’s the most stable element that can be. When the heat death of the universe comes along, bye and bye, everything will have degraded to iron. The cores of the oldest, dying stars are iron. It’s the great mass at the core of our planet, the foundation of our world.

The elements of the craft
To alchemists, there were only four elements: air, earth, fire, and water. The earliest recipe for smelting iron went like this—
Make a big vertical chimney out of brick or stone, and fill it with a mixture of two parts coal, one part iron ore, and ½ part limestone. Use big chunks so it will have a good draft. Set it on fire, and let it burn down completely. In the bottom of the chimney among the coal ashes there will be a spongy mass of soft iron combined with silica. That’s called a bloom. Pull it out, and make another fire in a small pit, and increase the heat of the fire by blowing air into it with a bellows. Get the bloom red hot, put it on a rock and pound on it with another rock until it’s cold. Repeat. Eventually, you will end up with wrought iron. "Wrought," by the way, is an old word that is the past perfect of work. Work, worked, wrought. Notice that no iron tools are required to make iron. It’s an absolutely bootstrap operation that is still practiced in a few remote areas of the world, and at reenactment meets. Note that the recipe uses air, earth, and fire. The fourth element water comes along later, but blacksmiths use them all.
Wrought iron was superseded about 120 years ago by steel. The difference is an important one. Prior to the discovery of the Bessemer smelting process, iron was produced in a solid solution with silica. The properties of wrought iron were much different that we are accustomed to now. It doesn’t rust, and it has a fibrous appearance like wood grain. It deforms easily and welds without flux at about 2000 degrees F. It doesn’t harden like carbon steel.
Steel is a solid solution of iron and carbon. We rarely if ever see traditional wrought iron in our society now. Iron tends to exist in cubic crystals, and the carbon has an interesting effect on the tiny molecular cubes that compose the crystal. Picture a cardboard box with both ends open. It deforms easily, so you can fold it flat simply by laying it on its side. That’s an analogy for wrought iron—soft, easily formed, but still generally kinda tough.
Now put a basketball inside the empty box, and close the ends up so it can’t get out. That’s the carbon atom in solution—it stiffens up the iron crystals so they can’t deform. With the basketball inside, you can’t mash the box flat, no matter how hard you try, and the resulting iron crystals are hard enough to make knife edges, bearings, all kinds of high-techy stuff. The original application was probably for making swords. A steel sword can chop an iron sword or a bronze one in two.
The carbon content for steel can vary from about 0.1% to something over 10%. Low carbon steel (roughly 0.18% to 0.30%) is used for low strength applications like wire, nails, rebar, and sheet metal. Medium carbon steel (about 0.45 to 0.75% carbon) is good for shock resistance, and it goes into railroad steel, structural steel, and tools. High carbon steel (0.75% to 1.1% carbon) is used for cutting edges, springs, bearings, and hard or high strength parts. More carbon than about 2 or 3% makes cast iron, which gets progressively softer with more carbon content because the little boxes are all full, so the extra carbon basketballs interrupt the symmetrical stacking of the cubic crystals.
Colors and hot steel
Here’s where the magic comes in. It’s real, and smiths practice it every day. The
American Bladesmithing Society has a test for becoming a journeyman smith which requires the applicant to demonstrate a blade that can—
- Cut a free hanging rope at least one inch in diameter with a single stroke,
- Chop completely through a 2x4" piece of wood twice,
- Shave hair off the smith’s arm, and finally,
- Bend 90 degrees without breaking.
You can read about it here-- http://www.americanbladesmith.com/...
The point of the test is to demonstrate that the knife steel is both hard and sharp, and malleable enough to bend without breaking. The magic is that we can heat treat high carbon steel to make it arbitrarily hard and tough, soft, or springy, and it’s one of the real miracles of the natural world that we can do all of that without any measuring devices except our own senses. (God, I love this shit...)
The Colors
Forging is properly done on steel that is in a temperature range of about 1000 to 2000 degrees. It so happens that we can read those temperatures at a glance, simply from the colors of the steel. The thermometer looks like this—
2000°F Bright yellow 1093°C
1900°F Dark yellow 1038°C
1800°F Orange yellow 982°C
1700°F Orange 927°C
1600°F Orange red 871°C
1500°F Bright red 816°C
1400°F Red 760°C
1300°F Medium red 704°C
1200°F Dull red 649°C
1100°F Slight red 593°C
1000°F Very slight red, mostly grey 538°C
0800°F Dark grey 427°C
0575°F Blue 302°C
0540°F Dark Purple 282°C
0520°F Purple 271°C
0500°F Brown/Purple 260°C
0480°F Brown 249°C
0465°F Dark Straw 241°C
0445°F Light Straw 229°C
0390°F Faint Straw 199°C
(The table above is excerpted from http://www.threeplanes.net/...
where you can see it in color--it's worth an extra click)
Note that the colors in this chart are actually two kinds—above 1000 F, they are incandescent colors—glowing steel. Incandescent colors range from a dull red at about 1000 degrees F up to the ignition temperature of steel, which is a sparkling white, at about 2300 degrees. Normal forging temperatures are usually around red to orange, maybe 1000 to 1800 degrees. There’s a saying that a blacksmith will go to hell if he works cold steel or undercharges for his work. It’s not really a joke.
Below 600 degrees, they are oxidation colors that result from a surface coating that develops on the hot steel. To see the oxidation colors, you have to perform a couple of extra steps--
Grind, file, or polish a shiny spot on the steel, then
Heat it until the color appears. Unlike the incandescent colors, oxidation colors aren't reversable--once it turns blue, it stays blue. With care, though, you can keep the colors in your finished work--hence the practice of bluing steel on guns.
In between, well, that’s just what hot steel looks like—it’s also called the brittle black range, and it means "don’t hit me, or I’ll break."
Heat treating
Heat treating always goes in three steps. Sometimes it seems like you can skip one of more of them, but it’s almost always a bad idea. The steps are—
- Anneal. If you heat steel to the Curie point and allow it to cool slowly over a period of several hours, the effect is like opening up all of the little cardboard boxes and letting the basketballs spill out. The carbon atoms migrate out of the cubic lattice, and the steel becomes as soft as it can be. The Curie point is about 1450 degrees F, and you can tell it by the nice red color. Cherry red, as it’s called traditionally. It corresponds to the temperature where iron loses its magnetic quality, so if you really want to check on the Curie point, keep a magnet around and see if it sticks. If it does, the steel isn’t hot enough. The traditional technique for annealing is to heat the steel to a bright red and then bury it in a bucket of wood ashes overnight.
- Harden. To harden steel, heat it to the Curie temperature again, and quench it—that is, cool it quickly. Traditionally, that meant plunging it into water. Heating the steel lets the carbon atoms get back in the little cubes, and quenching traps them there. Hardening is a risky step, though, because cooling the steel too quickly or too slowly or unevenly can cause cracks, warping, or inadequate hardening. Modern steels can be pretty temperamental, and there are a lot of would be knife makers who have found out that the magic takes some practice before you get it right. There is a whole culture of making knives with what’s called OCS, short for "old Chevy springs." Sometimes they turn out fine, but sometimes they don’t. If you try the hardening step and it doesn’t work, don’t do it again without going back to step #1. Don’t ask why right now, just do it. And next time, you might consider using oil for the quenching fluid. It just depends on the steel...
- Temper. It’s a common story that a novice smith makes a nice looking knife from an old file, hardens it, and it looks fine. But then, as he’s looking at it, it suddenly breaks in the middle, and half of it just drops on the floor. When you harden steel, especially OCS, it isn’t ready to use because it is way too brittle. You can toughen it up a lot without losing much of the hardness by tempering. And once again, nature or coincidence has provided us with an easy indicator. This is where the oxidation colors come in. You need to reheat the steel to let the basketballs move around just a little bit without actually getting out of their little boxes. The temperature range for tempering is about 325 degrees F up to maybe 650 degrees F, depending. Cooler tempering ranges are for very hard, delicate edges like chisels, files, and some knives. Higher tempering ranges make the steel tougher, but draw the hardness down a little bit, so the edges are less likely to chip, or the kitchen knives can be sharpened, and so on. The colors come from a very thin layer of oxidation on the steel, and they range from a faint yellow color at about 400 degrees to bronze, blue, purple, and so on. These colors work for most things—400 degrees is a bit high for the hardest of edge tools, but most knives can be tempered at a yellow to bronze color, springs at a blue, and percussion tools like hammers and cold chisels are tempered at a blue to purple color. Isn’t that cool?
Making iron into steel
There was a time when the height of technology was in the smithy. When knights wore armor and whacked at each other with swords and spears, it was important which sword was the hardest, the sharpest, and the most resistant to shock damage, and which armor most resistant to damage without being too heavy. That was well before the Bessemer smelters started producing carbon steel, and yet the lives of the highest nobility depended on having the best carbon steel available. There were several processes developed over the centuries, and the availability of high carbon steel has been a pivot of history more than once. Some of the techniques were deep secrets that have been lost and recreated through reverse engineering. Some were more a matter of luck than science, and produced unpredictable results.
Katanas and pattern welding
The traditional Japanese samurai sword may have been the first use of high carbon steel. It was made by soaking iron in a charcoal fire to let the iron absorb microscopic amounts of carbon into the surface, then folding and welding the iron repeatedly. Over a period of days, the iron would absorb enough carbon to permit it to be heat treated adequately, and in the process, it would develop a complex pattern from the folding and re-welding. The original swords are reputed to have thousands of such layers, which are the result of folding the steel maybe a dozen or more times. Modern smiths who use the technique typically fold the steel about 8 to 10 times, which yields 300 to 500 layers to get the best contrast for the patterns. Katanas also have a softer core with a high carbon edge, and typically are heat treated by coating part of the blade with clay during the quenching step to allow the back of the blade to be hardened less than the edge. The technique of using two types of steel is called lamination, and the business about tempering the steel at different cooling rates is differential heat treating. Both techniques are still in common use, although they are less necessary with the relatively cheap alloy steel that is available now.
Wootz steel
During and after the crusades, several mines in India are thought to have produced iron that was contaminated with small amounts of vanadium. http://metalrg.iisc.ernet.in/...
The steel from those mines was processed in small ingots which also contained enough carbon to produce high carbon steel. The ingots were used for a major sword making industry in and around Damascus, and the patterned steel that was produced is still called Damascus steel. Oddly enough, in my opinion, Damascus steel has much the same patterns as the pattern welded steel typical of Katanas, although for a completely different reason (e.g. the Vanadium content).
Crucible or blister steel
Another process for making high carbon steel was developed in Sweden and England in the 1700s. It was basically a mixture of wrought iron and cast iron, cooked together to get about the right carbon content. Blister steel was used for the edge tools of the first industrial revolution, but the high cost and low quality control of the process made steel a luxury item, and it was used very sparingly, to the point that old files were saved and welded to wrought iron for making edge tools like axes, chisels, and even shears.
Since about 1880 or 1900, the quality of steel has improved and cost has decreased so radically that wrought iron, blister steel, and laminated edges are found only in antiques and specialty items like handmade tools.
Road show
I remember reading once about blacksmiths in the civil war, when the smithy was a traveling affair installed in a caisson—sort of a two wheeled tool chest that carried tools, anvil and forge, plus 100 pounds of coal and 200 pounds of horse shoes. I remember that when I got to the last two words of the description, I suddenly thought—"Well, of course they carried horse shoes. Duh--." An army used lots of ironwork, and the smiths probably built and repaired everything from coffee cups to musket locks, but their main work was shoeing horses, so hence the shoes.
One of the interesting things about the craft though, is that the smiths could make almost anything else from those horse shoes. As an example, there is an article in one of the Foxfire books about making a muzzle loading rifle. You start with used horseshoes, weld them together into iron bars, wrap them around another bar and weld them together again, and so on.
As Douglas Adams said, "And to all you non-evolved species out there, the secret is to bang the rocks together, guys."
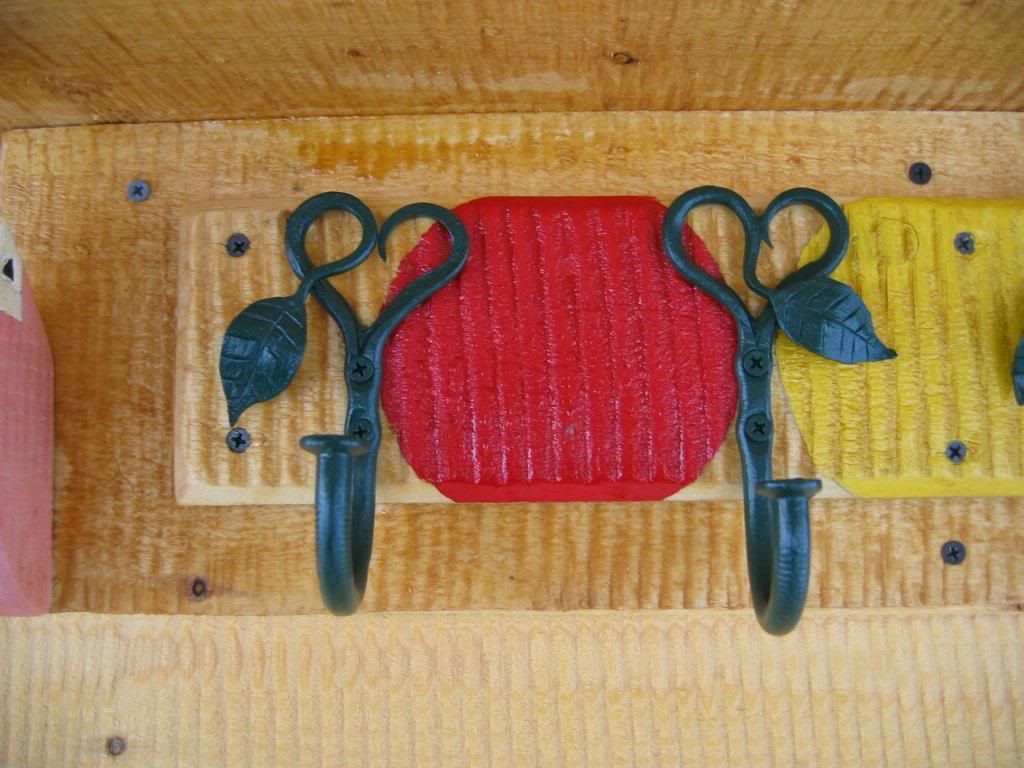
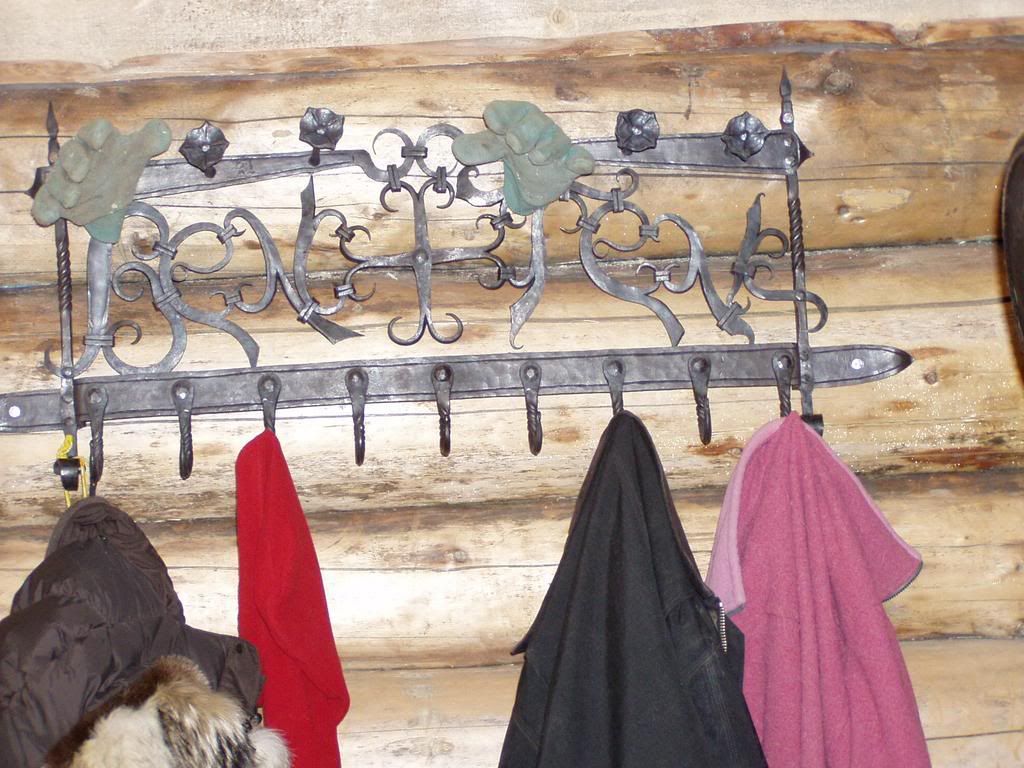
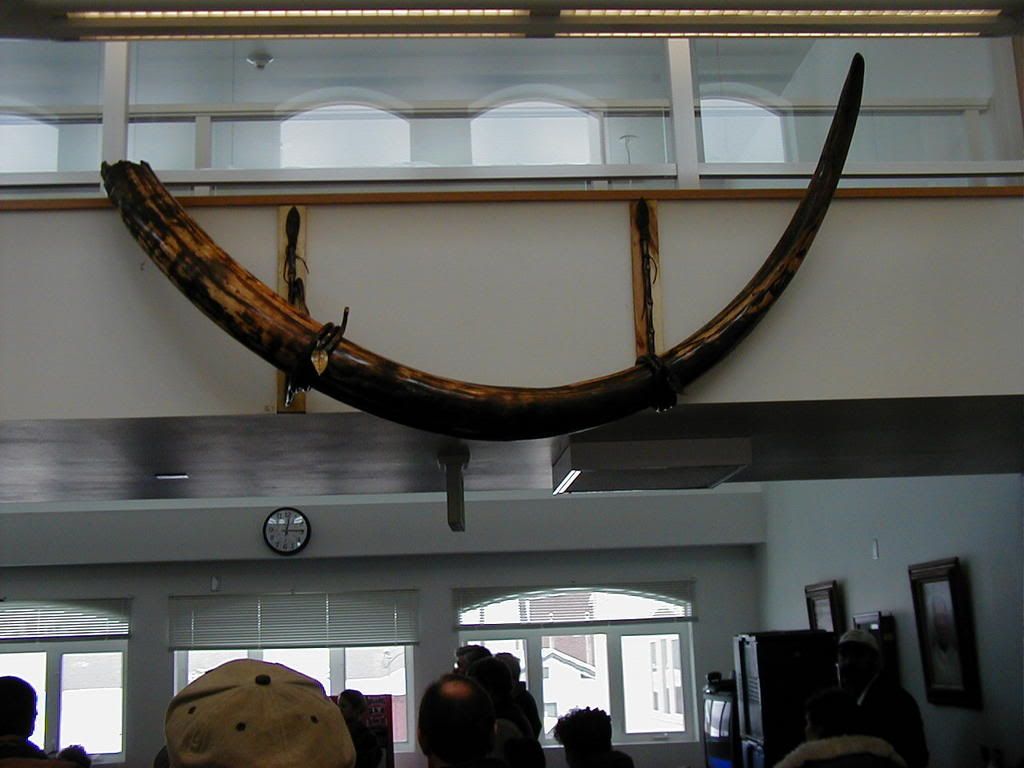
Footnote--Just for the record, most of these pictures are of work by my good friend and former "apprentice" Jake the Russian. I made the mammoth tusk brackets.
