Happy Sunday Bread Heads!
Rye is an acquired taste. Mrs. Dog hates it with a burning flame that is really something to see. I blame this on the fact that she had never had a slice of it until she had been living with me for more than 4 years. That late in life, it is really hard to come to the joy that is rye.
But even if you start your kids off early, it is still not a good idea to throw them in the deep end of a pool with a rye like the New York Style Rye I make, which is packed with onion flavors, caraways seeds and other complex and strong tastes. You’ll just wind up with a pouting child and maybe a life long aversion to rye bread.
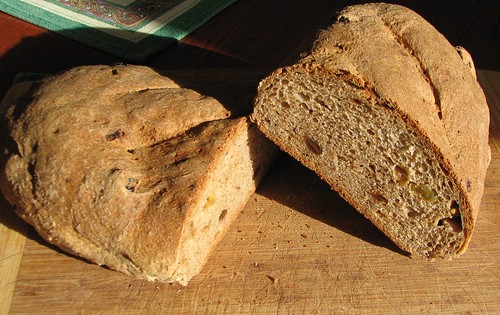
Which brings us to this weeks bread Raising Rye. This bread not only has a nice little treat in the form of white and dark raisins, but it allows the baker to control the strength of the rye taste by varying how long the sponge ferments. It can be as short as 2 hours or as long as 36.
The short fermentation gives only a light touch of rye flavor, while the long one will bring the yeasty, fermented flavor of rye right to front. For anyone who wants to introduce rye this control means that you can gentle the intended change management target along with a series of increasingly flavorful pieces of toast on Sunday mornings.
The fact that it is a mixed grain bread with some lovely raisins not only makes this bread a great accompaniment to any meal, it makes it a fairly healthy one, when enjoyed in moderation.
So, let’s get baking! Time and yeast wait for no man!
Raisin Rye
Ingredients:
For the Sponge:
2 cups rye flour (stone ground preferred but any will do)
1 package (2 ½ teaspoons) yeast
1 ½ cups hot (120 to 130 degrees) water
For the Dough:
½ cup white (Sultana) raisins
½ cup dark raisins
1 tablespoon vegetable oil
1 tablespoon molasses
2 teaspoons salt
½ cup hot (120- 130 degrees) water
1 ½ cups rye flour
1 ½ cups bread flour (you can use all purpose if that is all you have in the house)
Egg wash – 1 egg beaten with 1 teaspoon of milk (optional)
Baking pans – 1 sheet pan, covered with parchment paper
Method:
Nearly all ryes require some kind of sponge or sour to release the rye flavors. This one starts with a sponge. To make the sponge combine the rye flour, yeast and hot water in a medium sized bowl and whisk together. You can use your stand mixer for this, but it is really just dirtying it up for no good reason. Just whisk the ingredients into a batter, it will only take you about 1 minute.
Cover the bowl tightly with plastic wrap and allow it to ferment for between 2-36 hours. It will get foamy and bubbly in about 2 hours, and then it will retreat and foam again if you let it go the full 36. The amount of time you ferment the sponge will determine the amount of rye flavor that comes through in the finished loaves.
30 minutes before you are ready to make the dough, plump the raisins. Place both types of raisins in a small bowl and cover them with 1/3 cup of warm water. Allow them to sit for the whole 30 minutes then drain them and pat them dry with some paper towels.
To make the dough, scrape the sponge into your large mixing bowl or the work bowl of your stand mixer. Add the vegetable oil, molasses, and salt. Save yourself some brain damage and measure the vegetable oil first, this will coat the tablespoon with a thin layer of oil and make sure that all the molasses slides right off into the batter. Add the raisins and stir, using a wooden spoon or the flat paddle attachment of your stand mixer for 3 minutes to combine.
Add the rye and white flour ½ cup at a time, alternating and stirring each addition completely into the developing dough before adding the next one. The dough will now be a fairly shaggy mass that you can lift out of the bowl to knead (assuming you are doing this by hand). If it is really loose and slack, you can give it a couple of shots of flour, but don’t add too much, not more than a ¼ cup in any case.
If you are kneading this by hand, turn the dough out onto a floured work surface and flour your hands. Rye is a great flour, but it does tend to stay rather sticky through the kneading process. Resist the urge to add too much flour to reduce this stickiness or you will have a very dense loaf at the end. Just go to work with the push-turn-fold method and knead for 8 minutes.
If you are kneading this with your stand mixer, switch to the dough hook and knead at low speed for 8 minutes. You will probably need a couple of shots of flour to keep this dough from clinging to sides of the bowl.
When the dough is kneaded place it in a large greased bowl. Flip the dough over so it has a thin laying of oil on all over its surface and then cover the bowl with plastic wrap. Allow it to rise at room temperature until it has doubled in volume, about 45 minutes to a 1 hours.
When the dough has risen turn it out on a work surface and punch it down. Divide the dough into two equal portions and form into balls. Cover with a tea towel and allow the dough to rest for 5 minutes.
To form the loaves, roll each ball under your palms until you have about a 12” long cylinder. Place the loaves on the sheet pan and press them down slightly to flatten the tops. Cover with a clean tea towel. Allow them to rise until they have double in size, about 45 minutes.
20 minutes before baking, set a rack in the middle of your oven and preheat it to 350 degrees.
When the loaves are risen and the oven is hot, slash the tops with a sharp knife in three diagonal lines. This allows the bread to expand with out rupturing the crust and looking ugly. If you are using the egg wash paint each of the loaves.
Slip the sheet pan into the hot oven and bake for 1 hour.
The bread will be a dark brown and will have a nice hard, hollow sound when thumped on the bottom with a forefinger when it is done.
Cool the loaves on a wire rack.
The bread will last for a couple of weeks if wrapped in plastic, or can be frozen for up to 2 months. To freeze just double wrap the bread in plastic and put in the freezer. To revive it, remove from the freezer and allow it to thaw completely in the plastic at room temperature, it will take about 24 hours.
Remove the plastic wrap and then bake in a 325 degree oven for 10 minutes. It will be just the same as it was when it first came out of the oven.
The flour is yours.
