I've been making what I call scrap quilts for as long as I've been making quilts, and that's more than 40 years now. We commonly think of scrap quilts as those made out of the leftovers from making clothes, or from the good parts of worn out clothing, and that's what scrap quilts used to be. Most of today's scrap quilts have less humble origins, since many of today's quilters don't make clothing, and most of the clothing that wears out is of fabric not suitable for quilts.
But quilters have fat quarters, and jelly rolls, and layer cakes, and honey buns, all delicious textile treats. We also have the leftovers from making other quilts. My particular Achilles heel is fat quarters, especially beautifully coordinated packages of 8 or so fat quarters. These are 18" x 22" pieces of fabric, a quarter yard, but cut lengthwise from 1/2 yard of fabric instead of crosswise as is traditional. Early on in my career, I had collected so many of these that I could almost insulate a room with them! So I set out to figure out what to do with them to make them easiest to use.
That meant sitting down and really figuring out what kinds of quilt patterns I liked to make best and what shapes they were made from. After a lot of thinking, I finally came up with a way to cut up those fat quarters to be most useful to me. I cut them in strips that are 6 sizes. They are 1 1/2", 2", 2 1/2", 3", 3 1/2" and 5" wide. This takes up almost the whole fat quarter, leaving only enough for trimming and squaring up the strips. Apologies for the size of the photo, I've tried many times to fix it and it just won't fix. The rest of the photos are OK, though.
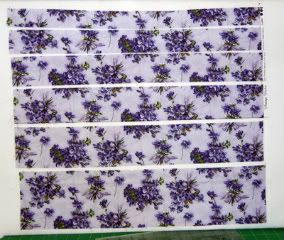
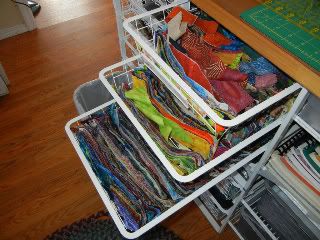
I sort them by size in wire baskets under my cutting table. With these strips, I could easily cut the individual pieces I needed to make the kinds of block patterns that I like to make. Then when I wanted to make a scrap quilt, a lot of the work was already done, and all I had to do was get out my drawer full of whatever size strips I needed, cut my individual pieces, and start sewing. It has worked well for me for the past 20+ years, and I've made a lot of quilts from those strips.
I cut backgrounds and borders from larger yardage, especially for what I call the "coordinated block" quilts that all have the same background. Then whatever is left over after that goes into the baskets with the strips.
But more than how to cut up your fabric is how to put it all together to make beautiful quilts. I have three methods for making scrap quilts that I most commonly use. They are the coordinated block method, the fabric menu method, and the brown bag method. I'll describe these methods in more detail, but first you must be aware of the most important characteristic of your fabric before you can put blocks together. That is VALUE. How dark or light your fabric is compared with the other fabrics in your block or in your quilt. Blocks get their designs by the careful placement of dark and light pieces to form a pattern. Stars commonly have 8 dark triangles that form the star points, pinwheels have 4 dark and 4 light triangles that form the swirling pattern. The picture below is of two versions of the Barbara Frietchie Star block.
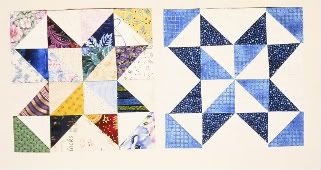
The first one is done in just a few colors, but the second is done in a wide array of colors and prints. The reason the second one holds together is that the places in the block that are supposed to stand out – the star points – are made with dark fabric, while the parts that are not supposed to stand out are made with light fabrics. (Of course we could have done just the opposite – the star points light and the background dark – but it's the contrast between the two that provides the pattern.)
Here are my three favorite ways of putting fabrics together for scrap quilts.
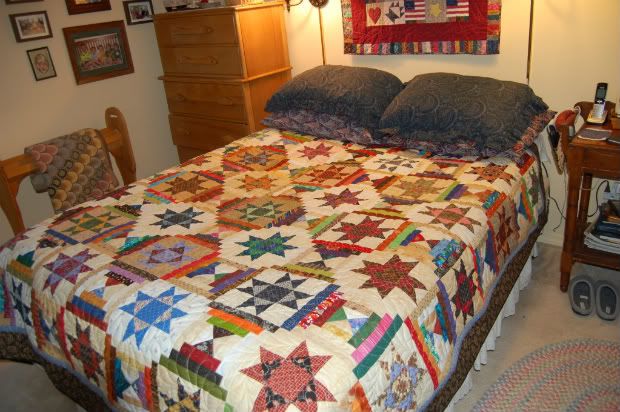
The first, and the most comfortable for many people, is the coordinated block method, where each block is made with a coordinated, pleasing group of fabrics. Each block is made with a different group of fabrics but they are all made with the same background. The sashing strips between the blocks are also made of the background fabric, allowing each block to stand alone while being a part of a larger design. This one, called "Jelly Beans" is made with the Skyrocket block. (I call it Jelly Beans because the colors are like those in a bowl of the candies.)
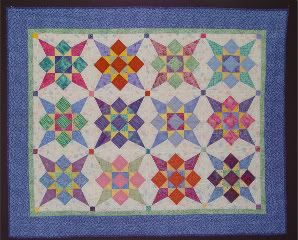
Another method is the fabric menu method, where each part of a block is assigned a color, but I used many different fabrics that are that color to make that part of the block. Blackford's Beauty shown here is an example of that.
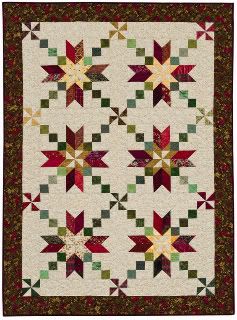
The star points are all reds, the squares are all greens, and the center stars are all varieties of yellow. In this quilt, I made the center of each block out of only one yellow or gold, thinking it would be too confusing to do otherwise (especially for me!!). This one, called Fireworks, is also made with the fabric menu technique, but it is a little harder to follow.
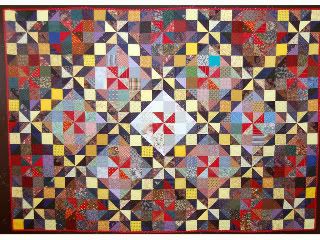
The star points are all dark blue, the pinwheels are all red, the squares connecting the blocks are all yellows, and the backgrounds are all either light, medium, or dark, depending on where in the quilt the block is placed. It was much more complicated to make, but the final result was worth the effort, I think.
The last method is the brown bag method. When I make a quilt this way, I have two brown bags, or piles, of fabrics, one light and one dark. When I need a light fabric, I reach into the light bag and pull out a piece, and the same when I need a dark fabric. Log Cabin quilts are commonly made that way, but many others are as well. First, my newest Log Cabin quilt.
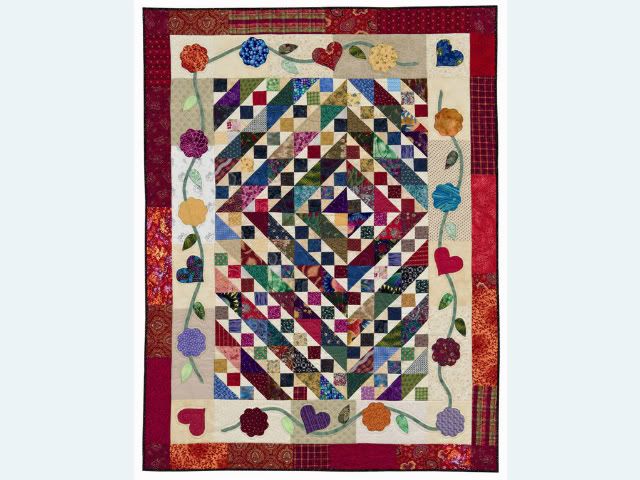
This one is made with a block called Shaded Four Patch (I call them Magic Triangles because you make the blocks two at a time) and the quilt is called Askew. This one is really scrappy – the light border with the appliqué on it is made of light pieces, and the border is a variety of red rectangles of all different sizes.
So the lesson to take away from this is not to hoard your fat quarters, cut them up and use them to make comforting scrap quilts.
In the interest of full disclosure – I've been making and writing about scrap quilts for more than 20 years – you can find more info on my website at www.sallyschneider.com
