Happy Sunday Bead Heads!
This week I’m going to share a recipe that I just finished perfecting, namely Gingerbread Scones. I found a recipe from an old B&B cook book for what they called Gingerbread scones, but when I made it, the result was horrible. I should have known better when the so-called gingerbread did not even have any ginger.
The scones turned out hard and dense and dry, everything you don’t want your scones to be. As I was complaining bitterly, Mrs. Dog said “Well, hell, honey, you’re a baker, why don’t you just make your own recipe if you want them that badly?”
Sometimes we need the Shakaboku (that swift spiritual kick to the head) to get our asses in gear. But once you’ve received it, well you just have to roll up your sleeves and get baking!
So I started thinking about what I wanted in a gingerbread scone. It needed to be scone like, of course, so it was going to need to be the right kind of dense without being dry or too hard-tack like. And, of course, there had to be the elements of gingerbread, so that meant lots of ginger, cinnamon and nutmeg, plus molasses.
The problem was going to be that the molasses were really viscous, and an additional liquid. I tried just subbing the molasses for some of the sour cream, but that was unsatisfactory, with the same problem of getting little rocks that would not rise. So I decided that what I needed was just more flour to balance out the liquid of the molasses and leave all the other proportions the same for a cream scone.
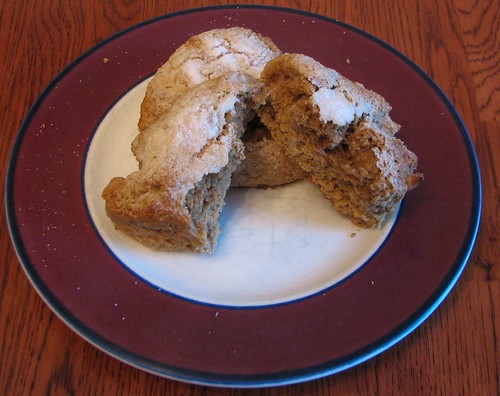
So simple, once you really think it through, but the result is a lovely brown scone bursting with gingerbread flavor, just firm enough to put butter or proper double cream on!
So now that I have your mouths watering, let’s make some Gingerbread Scones!
Gingerbread Scones
Ingredients:
3 ½ cups all purpose flour
¾ cup light brown sugar (you can use dark if that is what you have on hand)
1 tablespoon baking powered (if your are making these at 5,000 feet or higher reduce by half)
½ teaspoon baking soda (likewise reduce by half above 5,000 feet)
3 teaspoons ground ginger
2 teaspoons ground cinnamon
1 teaspoon freshly ground nutmeg
5 tablespoons butter (unsalted preferred but not required)
2 eggs
¾ cup sour cream
¼ cup unsulfured molasses (you want the full flavor for this recipe)
3 tablespoons milk
3 tablespoons sugar
Baking Pan – 1 sheet pan lined with parchment paper
Method:
Set a rack in the middle of your oven and preheat to 450 degrees.
In a large bowl, combine the flour, brown sugar, baking powder, baking soda, ginger, cinnamon and nutmeg. Give it few swipes with a wire whisk to make sure that everything is evenly distributed.
Now, let’s talk about the butter. Last week some folks talked about the grater method of adding the butter to scones. If that is the technique you know, you can use it, but I am not a fan of this for several reasons. The biggest is that I find that it does not really replicate the action of rubbing the flour into the butter with your fingers.
The goal here and in pie crust is to cover small amounts of butter in flour. Then when it all bakes this provides a series of layers that are light to the teeth and tongue, giving the feeling of flakiness.
When butter is grated I find that it either too big and does not give a real lightness to the pastry or it is too small to rub in without melting too much and losing the same effect. I know that some folk find the idea of rubbing the butter in intimidating, but if you have every played with Play-Dough you’ve got the chops to do this.
Cut the butter into 10 or so pieces and toss in the flour to coat them. Now it is time to rub the butter into the flour, or vice versa. Do this by picking up the pieces of butter between your thumb and forefinger. Give it a quick squeeze and push forward with your thumb. Drop it back into the flour and get another one. As your skill level comes up you can do this with both hands at that same time.
Keep doing this until the butter has been rubbed into the flour and it all looks a bit like corn meal. There should be no discernable pieces of butter when you are done. Be sure to dig down to the bottom of the bowl with your fingers, because sometimes pieces of butter hide out there. This will all take about five minutes or so, so take your time and do it right. It will make a huge difference in the texture of your scones!
Given that it only takes five minutes and you really can’t mess it up, take the time to learn this technique that every baker in the last 200 years or so knew. If they could do it, so can you!
Once the butter is rubbed in, it is time for the wet ingredients. Lightly beat your eggs in a small bowl. Add the sour cream and the molasses. Whisk until it is a smooth mixture.
Make a well in the flour and then using a spatula, scrape all of the mixture into the well. Use a fork or a spatula to mix the dry ingredients and the wet together. You are not beating this, just getting it all mixed together.
When it has formed a dough, turn it out onto a lightly floured work surface. Form it into the loaf. Cut the loaf into three roughly equal portions (don’t make yourself insane about this, just eyeball it).
Form each section into a disk about 5” in diameter. Cut the disks into four pieces by making one vertical and one horizontal cut in each disk. This will give you four triangular scones per disk.
Place the scones on your prepared sheet pan. Using a pastry brush, brush the tops of the scones with milk. Liberally sprinkle sugar over the milk to from a glaze.
Slide the pan into the hot oven and bake for 12 minutes.
Remove the pan from the oven and using a spatula, place the scones on a wire rack to cool. Let them cool for at least 10 minutes before serving.
These scones keep very well in a plastic bag for up to three days, that is if you can keep your hands off of them!
So there you have it, Bread Heads, the perfect gingerbread scone, ready to amaze your friends any time you have about 30 minutes.
The flour is yours!
