The Saturday Morning Home Repair Blog (SMHRB) is where we gather to discuss the many and varied aspects of home repair. Some here are trained professionals. Some, talented DIYers. Some, hopeless thumb-hammerers. All are welcome. Please feel encouraged to ask questions, share successes, lament sags, drips and cracks and, as always, share any advice that you have for the rest of us.
********* ********* *********
YOUR ATTENTION PLEASE!
Ninepatch has come up with a very worthwhile project for NN 2014 and the Detroit VA Hospital vets, who have bravely served on our behalf, and she's opening it up to us, the members of SMHRB, so LISTEN UP! She is a quilter, and her idea is to make a fabulous quilt with message panels sewn in for the vets; each of us can donate money ($10 minimum, no max, PayPal or check or other method TBD), along with a personal message for the vets (up to 100 characters or so), to be hand-lettered on the message panels. All monies and the quilt itself will go to the vets, to be used by them and for them.
You are invited to input ideas and suggestions in the comments over the next 2 weeks, any final details will be worked out and posted by then.
The deadline for submissions is June 15.
Quilt/donations presentation will take place during NN Detroit, July 18.
Let's do this, guys, this is our project now; from our little group to folks who put their lives on the line, literally, to keep us safe and free.
Nine will be along shortly if she isn't here already, she had a rough week and (possibly) a rough night.
Thank you!
John
********* ********* *********
(We now take you back to your regularly scheduled SMHRB diary...)
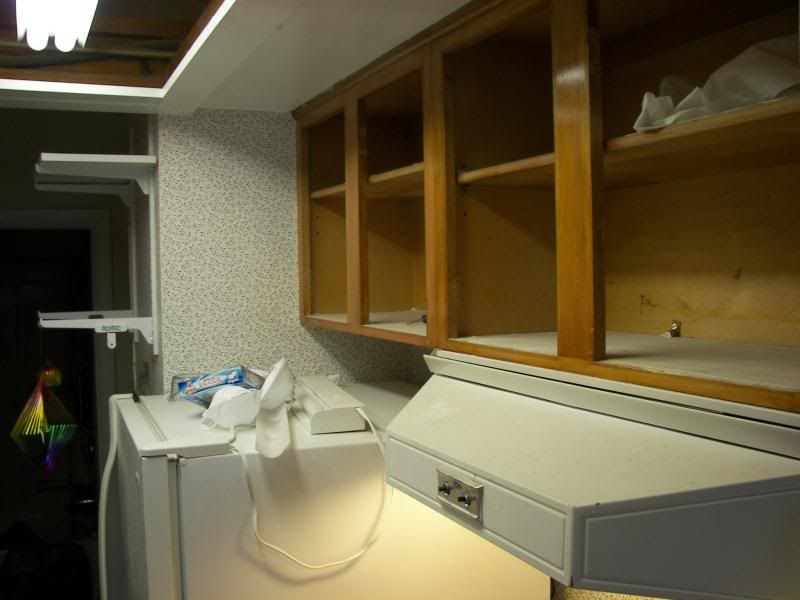
In the summer of 2012, I decided my kitchen really needed an update but, as a renter not an owner, I had limited options. My kitchen is very small, in some houses it wouldn't even qualify as a butler's pantry. It's one of those small, apartment sized spaces, not much more than a walk through, that's pretty much only for cooking and doing dishes with a refrigerator thrown in for good measure. At one end is my bathroom and a small, very dark hall to my bedroom and studio. At the other end is a wonderful, west-facing double window that lets in a lot of light. Grab a fresh cuppa and follow me past the orange danish to hear the rest.
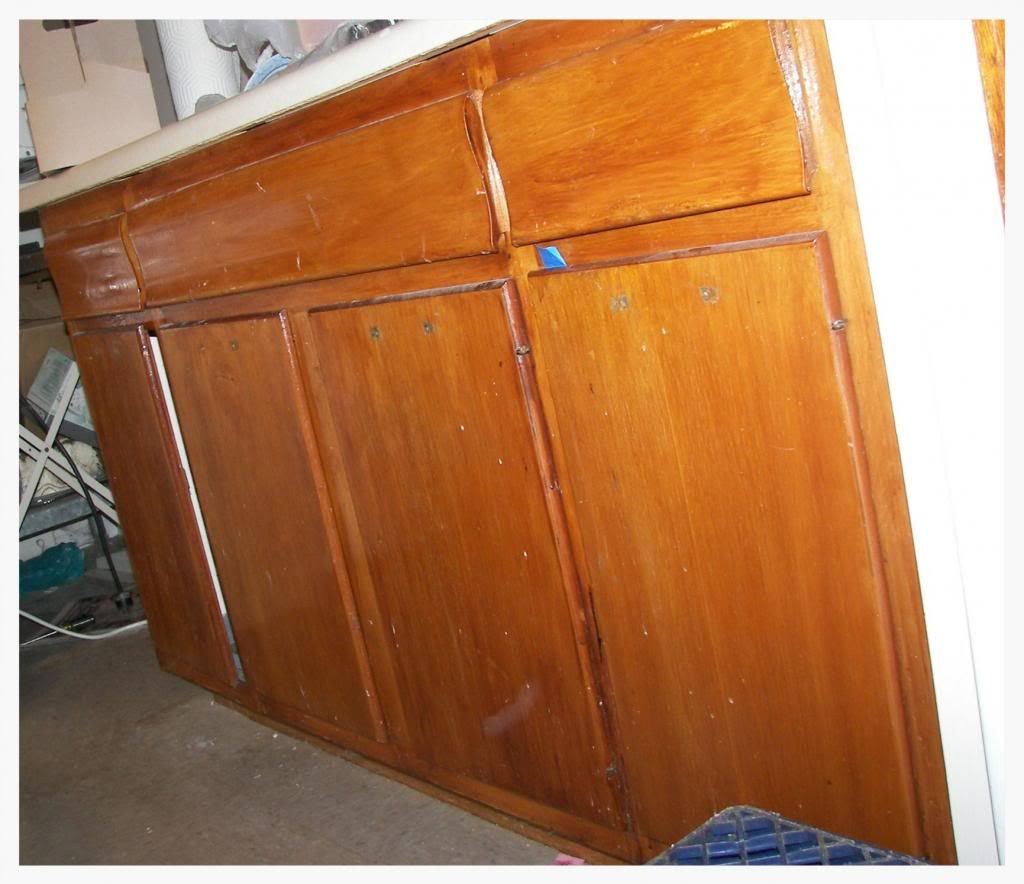 The cupboards were that awful red, funky, 1950s color with far too many layers of varnish. The woman who had this unit before me must have had her son do them every year and, he obviously didn't know much about drips or brush streaks. The end result was a small space looking even smaller because it was so dark, and looking crappy (can we say that here?) because it had been so poorly maintained. The clear solution was to lighten up the woodwork. Simple, effective, and not too expensive in the long run.
The first thing I did, before looking at paint, hardware, tools, or anything else,was to contact the property owner and asked for permission to make the changes I wanted to make. Never, ever skip this step, even if your landlord has told you in the past to feel free to do what you'd like to his or her property in this regard. A quick phone call can keep you out of dutch and goes a long way in keeping good tenant-landlord relations. A property owner has the right to change their mind. Don't get caught on the wrong side of that decision. Also, keep your word. I asked the property owner if I could paint my cabinets all white, no stencils, no antiquing, just plain, high gloss white. Once I gave them that assurance they gave me the go ahead. I kept my word. The next time the head of maintenance was on the property for the annual city inspection, he was really pleased with what he saw and appreciated that I didn't go cheap. Now, as units open up he has the painters do the kitchen cabinets white. I'm a trendsetter! LOL
Then it was off to the box store for supplies. Don't skimp here. Low quality paint will give you low quality results that may not hold up over time in a space that needs to be wiped down on a regular basis. Kitchens get a lot of traffic, spills and drips. The first time you get a serious chip or rubbed off paint after putting in all that time and effort, you'll wish you'd spent a few bucks more on the good stuff. I chose Behr High Gloss White and applied it with 4" sponge rollers. I wanted that little bit of mottled texture and the sponge rollers worked perfectly. I got a break on the rollers on Amazon. They had a "contractors pack" of 10 rollers for $11 with free shipping. When all was said and done, with primer, paint, rollers, sand paper, new hardware, painter's masks, disposable gloves and painter's tape, I spent just shy of $100. Worth every penny as far as I'm concerned.
To get started, I thoroughly washed every surface, interior and exterior, then wiped it all down with a vinegar solution. When I came across stubborn kitchen grease spots, especially on the doors above the stove, I pulled out a scrubbie and used full strength vinegar. I removed all the doors and hardware, then set about sanding. I learned something really important about sanding with this project. I probably didn't need to do quite as much as my OCD approach to projects causes me to believe. LOL But, any excuse for a new toy, in this case a B&D palm sander. 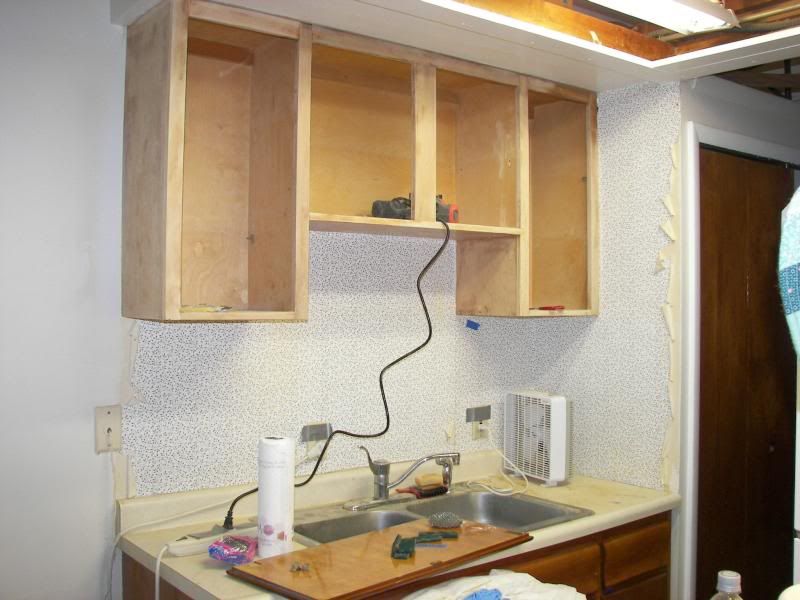
If you're going to be painting over old wood, like I was, you're going to have to use a sealer and primer. That's just not negotiable. I always have been a fan of sealers and learned something new on this project. Previously, I've almost always worked on pre-painted surfaces or walls and woodwork. KilZ has always been my go to product but on these cabinets 2 coats still didn't stop the leak through of the tanins inherent to old wood stains. I came here and, of course, got the right answer. I needed BIN Zinnser. Its shellac-based formula was the right primer for my old wood. Worked like a charm!
But, there's good news and bad news with BIN's. Bad news - you absolutely must have really good ventilation and you need to wear a painter's mask. The stuff will have you stoned inside of 5 minutes. I was able to do the doors outside on the patio so that helped, but I still wore a mask. The stuff is wicked! Inside, I kept 2 fans going at all times and used one specifically in the window to pull what the other was blowing out of the kitchen. Good news - it is so easy to clean up! For my brushes it required nothing more than ammonia and water. I didn't use rollers more than once so those were tossed.
BINs dries to the touch in 20 minutes, and a second coat within an hour will give you the best result. I chose to allow my cabinets and doors to dry for 72 hours before I began painting.
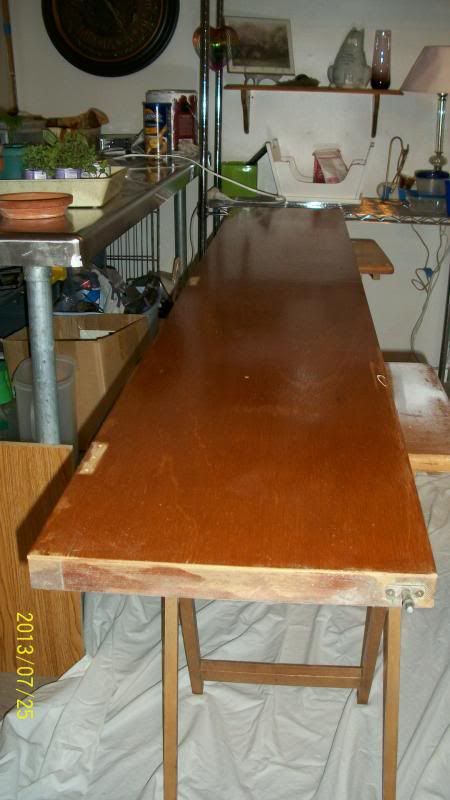
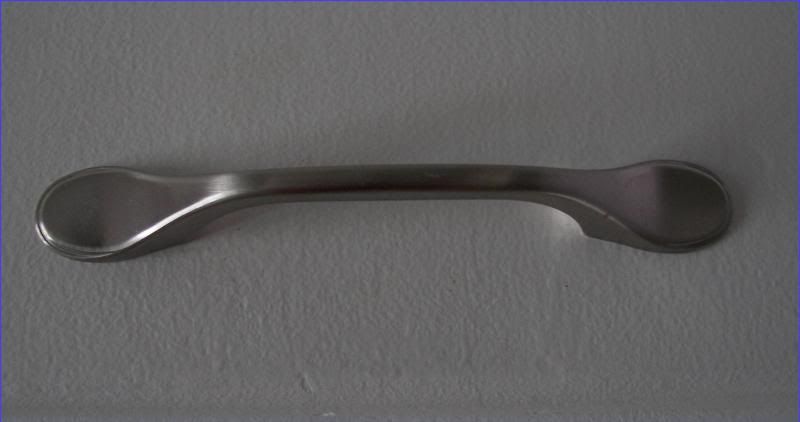 Since I chose a cabinet handle slightly wider than the original hardware, I used wood filler to close up the original holes and drilled the new ones before I started priming. I had budgeted $5 for each of 12 new handles I needed and was pleasantly suprised when I found the brushed nickle piece in the pic. They were only $2.29, they are very simple, look contemporary, and, best of all, they are very easy to keep clean. My kind of deal. I had to keep the original hinges, which were copper colored, so I gave them a quick coat of white spray paint, let them dry for 24 hours, and put everything back where it belonged.
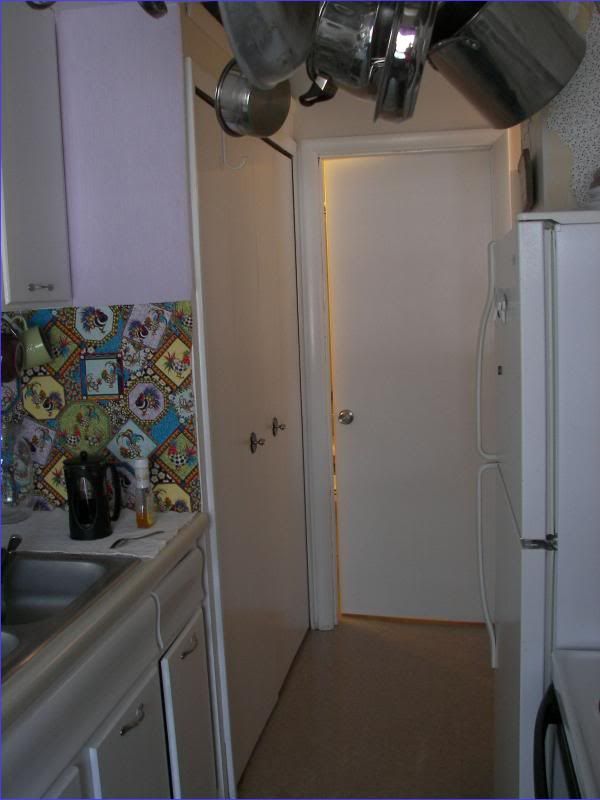
 Then it was on to the bathroom and linen closet doors and the folding doors which cover the double-wide closet in the hallway. Those folding doors were by far the worst part of this project. They were a pain the arse to take down, a pain in the arse to separate, a pain in the arse to sand indoors because of a rainy streak, and an absolutely royal pain in the arse to rehang. Never again. But, they really had to be done to lighten up that hallway.
One of the inner panels where the knob should have been had a nasty golfball sized hole ripped into it and the ugly hardware didn't cover the hole entirely. We have an old fashioned hardware store in our little town so I headed there for a solution. They found me plain metal escutcheons 3" wide. I got 4 and spray painted them black. I put one on each side of the door and put a simple brushed nickel drawer pull knob for a handle. It looks nice. Those old fashioned hardware stores are so wonderful.
So, how about I stop blathering and show you some results? :-> The pics were all taken with the natural light I get from that west-facing double window. Let there be light!
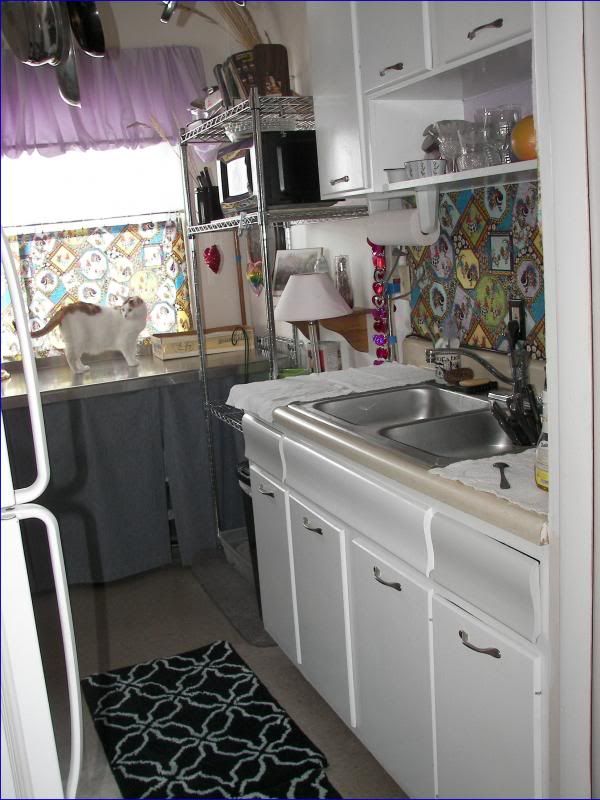
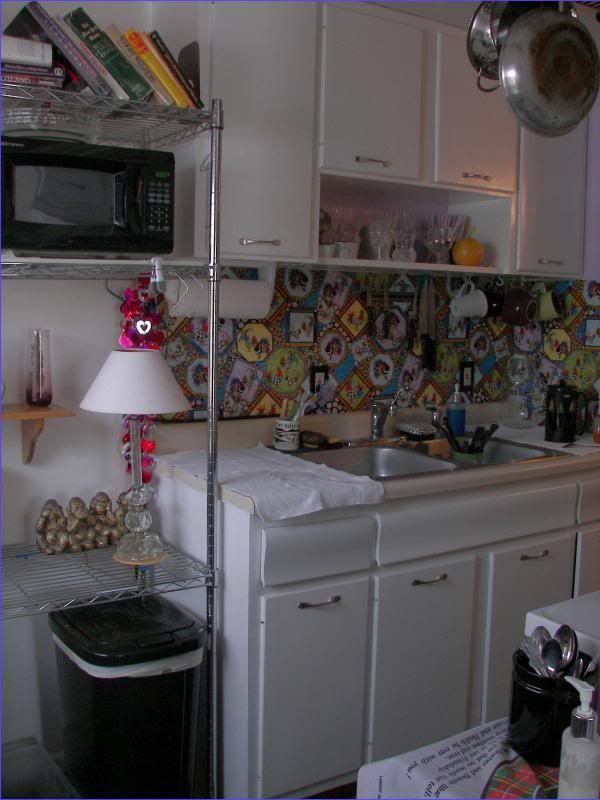
You probably noticed that the fabric in my lower cafe curtains matches what's above the sink. It's the same fabric actually. I matched the pattern the same as I would have for wall paper but lapped a seam so it wouldn't be raw edged. I used heavy duty spray starch to "glue" the fabric to the wall. It's messy but very effective. And, if you need to make a spot repair down the road it's no big deal. To get back to the original semi-gloss wall, you just need to peel off the fabric and wash the wall down with a warm vinegar solution. No harm, no foul. Same said head of maintenance mentioned above saw this and just chuckled. He said his wife and daughter would have a ball with this idea. I haven't seen him since then so I don't know how that turned out.
I still need to replace the countertop - it's old, stained and hideous. This summer I hope to find someone who does home improvements and might have a piece of countertop they'd be willing to provide and install in exchange for some seamstress services. In the past I've gotten a lot of help that way because I can fix jeans, replace zippers in work jackets, mend holes in uniforms, that sort of stuff. There are lots of single guys out there who really value that kind of help. Wish me luck!
What have you been up to lately? Got some pics? Got a question? This is the place to be for all things home repair whether you're a rookie or an old master. Besides, we're a fun bunch to hang out with. Go get a cuppa and join us.
Peace.

