Happy Friday, beer fans! Here comes the homebrewing series!
I would like to comment here that the dKos spellchecker doesn't like "homebrewing" as one word, but that is definitely the standard American usage.
Brewing Part 1 was about ingredients, which are common to both home and industrial-scale brewing. The remaining parts will be strictly about what I do at home. If you've ever taken the tour at Anheuser-Busch or Coors (or Guinness, or Heineken) you saw how to make 50,000 gallons of beer. [I took the tour several times before I could drink, back when the A-B brewery in Panorama City CA was still "Busch Gardens". ] I'll show you how I make 5 gallons.
The series will probably be 5 parts total: today is Mashing, to be followed by Boiling the Wort, Fermenting, and Bottling/Kegging.
If you actually want to learn to brew, good references are Brew Your Own magazine and How To Brew. I'm not planning to give a lesson, just talk about what I do. One of the first things a homebrewer learns is that there is no one right way to do things; often there isn't even a consensus on best practice. Many paths can lead to good beer. I know there are several other homebrewers among FNBB readers, and I'll bet none of them do things exactly the way I do. We can discuss this (politely, please) in the comments.
Whatever path you choose, your recipe needs to be precise. This is one way brewing differs from cooking. A friend I sometimes make dinner for teases me when I open a cookbook; she prefers to cook from memory and gut feeling, "a little of this". But if I brewed that way she wouldn't like my beer so much. Without an accurate recipe, you aren't going to be able to repeat the good beers. Even with a tried recipe, you'll find that repeatability requires paying very careful attention to your brewing process. There is software sold for this purpose; I use BeerSmith. OK, I've printed my recipe and I'm ready to start work.
The first step is to make a "mash" out of grain and hot water. From Wiki:
Malted barley dried at a sufficiently low temperature contains enzymes such as amylase which convert starch into sugar. Therefore, sugars can be extracted from the barley's own starches simply by soaking the grain in water at a controlled temperature; this is mashing.
Beginning homebrewers will not do this themselves; they will pay the malt company to do it, and buy "malt extract" powder or syrup at the homebrew store. You can make excellent beer from extract, but will be somewhat limited in the recipes you can choose, and you will save money by doing this yourself. I have a couple of favorite recipes that I still brew from extract but today I'm doing an "all grain" brew.
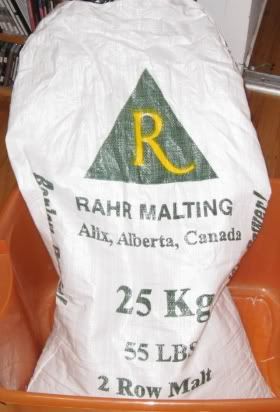
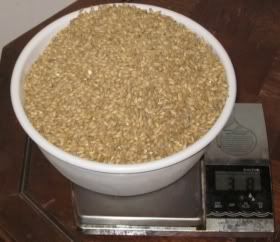
First I weigh the grain, then mill it. 5 gallons of beer will need 8 to 15 pounds of grain, or even more for extra strong beers.
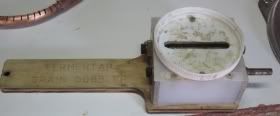
This little mill is designed for homebrewers. You don't have to invest in a scale and a mill to brew all grain, but it lets you save more per-batch money by buying some of your favorite grains in bulk. The homebrew store will mill the grain for you, but they might charge for this, and also you can't store the grain very long after it's milled. It's not "ground", you're breaking up the kernels but not making flour.
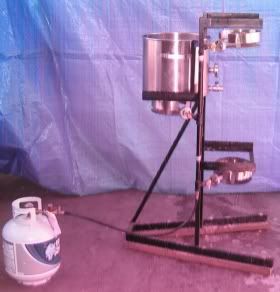
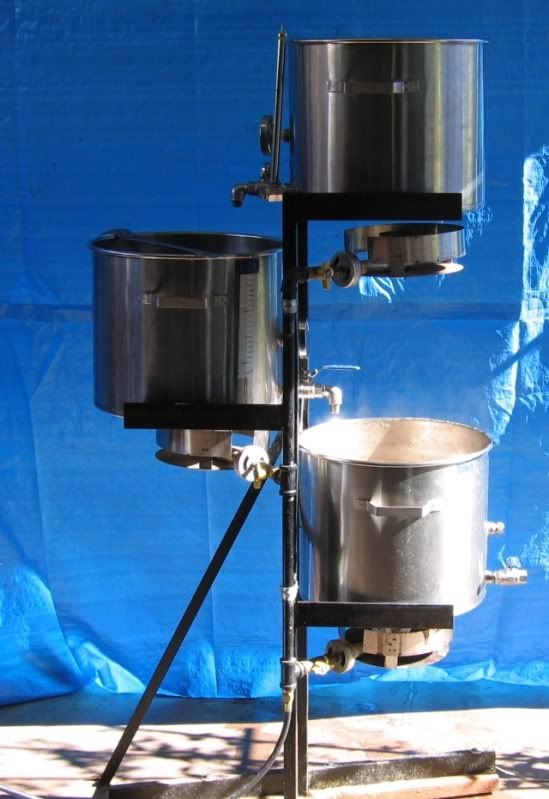
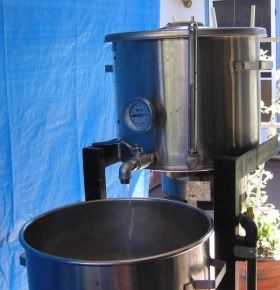
Here's my brewing setup. This kind of 3-tiered structure is very common among all-grain homebrewers because it allows the liquid to gravity flow from top to bottom and doesn't require pumps. Without a multi-level, multi-burner setup or a pump, you have a choice of various unsafe ways of moving scalding hot water. That's another advantage for brewing from extract; you need only one burner and one kettle.
I bought this from
MoreBeer in Concord CA and it cost $1600 new, in 2006. MoreBeer calls them "brewing sculptures". Fancy equipment doesn't necessarily make better beer (there's a whole subculture of brewers who brag about how cheap their gear is, and others who tell you that real men learn to weld and make their own sculpture) but this is a good midprice rig.
Homebrewers usually do either 5 or 10 gallon batches; this is a 5 gallon setup. To get 5 gallons of finished product, each of these kettles is 9 gallon capacity.
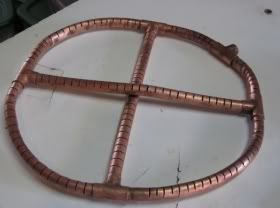
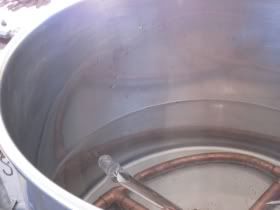
The kettle on the middle level of the sculpture is the "mash tun". The copper tubing manifold at the bottom has slots cut in it for draining the liquid at the end of mashing.
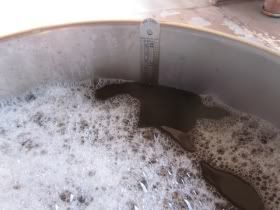
Measure the water into the mash tun and heat it. This part of the procedure requires precision: you have to know pretty exactly how much grain and how much water you have, and what the temperature is. The software calculated this for me. I have 13.75 pounds of grain and want a 152F mash, so I want 17.2 quarts of water at 164F. You can see the top of the floating thermometer in the foreground; it's very desirable to have the water temperature accurate within a degree. The mash tun has a thermometer mounted in it, but depending on how much grain you're going to start with the water level may not reach it.
|
 |
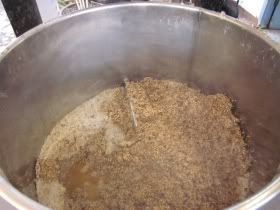
So after watching carefully, when the water reaches the desired temperature, I turn off the gas and stir in the milled grain. This is the one part of the process where it's nice to have help, so the extra person can stir. Otherwise I pour half of it, stir, then add the other half. Then check the temperature again, and add hot water or cold water or light the fire again as needed to get the desired mash temperature. If your water temp was right when you added the grain, you shouldn't need to. Put the lid on the mash tun and set the timer for an hour.
This is a place where brewing is a science not an art. Repeating that quote above:
at a controlled temperature
The enzymes that convert starches to fermentable sugars work best between about 145F and 160F, and even within this range a difference of a couple degrees will be noticeable in the finished beer. THE key step in making a beer that tastes like the recipe intends is getting the starting mash temperature correct within +/- 1 degree. The batch I'm doing today is mashed at 152F, which should give a medium-body beer.
During the hour that the mash is sitting, we put the top level kettle on and fill it with water. This is called the "hot liquor tank" (HLT); once you start the brewing process it's no longer just water but "brewing liquor". Yes, there's a lot of jargon here. The HLT has a sight glass so you can fill and empty it by eyeball; precise measurement is less important at this step. Put in about 6 to 6.5 gallons of water and heat it to 170F.
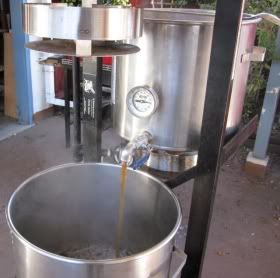
At the end of an hour I turn the heat back on under the mash tun and warm the mash to 170F. This is called "mash out"; warming the sugar solution makes it flow a little better. This phase is called "lautering" and "sparging", like most brewing jargon I think this is German. Open the valve at the bottom of the mash tun and let the sugar solution (now called "wort") flow into the "boil kettle" at the bottom level. Then refill the mash tun with the hot water from the hot liquor tank, stir well, and drain this also into the boil kettle.
As with other parts of the process, there are multiple ways to do this. What I just described is "batch sparging", another and perhaps more common process is "continuous sparging" where you just crack the valves and let hot water trickle in the top while the wort trickles out the bottom. Either way, the goal is to rinse all the soluble sugars off the grain.
|
 |
We'll boil away nearly two gallons, so start here with something over 7 gal (I aim for a depth of 245mm, measured with this steel rule). If making a very strong beer you might start with even more wort, that's why I have 9 gallon kettles to make 5 gallons of finished product. Light the fire!
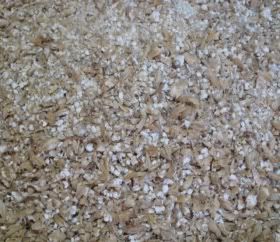
The residue is called "spent grain". Homebrewers put it in the compost pile or the garbage disposal after it cools.
This is the end of Part 2. In part 3 I will boil the wort, flavor it with hops, cool, filter, and add yeast.
I hope somebody enjoyed this, it was sure a lot of work. I'm drinking homebrew! Well at least one, I've also got Hop Stoopid. What are you drinking?