 Welcome to our series on the basics of visually enhancing your diaries and comments! If you are joining us late, you can find links to the entire series at the top of the first diary in the series, New Diarists: Links & Blockquotes. We update that list as new diaries are added. ♥ Follow us above to see future installments in your stream. Welcome to our series on the basics of visually enhancing your diaries and comments! If you are joining us late, you can find links to the entire series at the top of the first diary in the series, New Diarists: Links & Blockquotes. We update that list as new diaries are added. ♥ Follow us above to see future installments in your stream. |
Last time,
nomandates discussed how to create a box like the blue one above, using the html tags for a table. Today, we'll talk about how to use those same tags to create something more like what we think of as a "table", a spreadsheet-like grid arrangement with rows and columns. We can use these as actual data tables, but we can also use them to impose a visual layout on our diaries. Real-world html does not use tables for that purpose, if it is done right! But inside Daily Kos, a large swath of html is not available for our use, and our means of sticking various visual elements in place are limited.
We'll stay with relatively simple tables today. Next time, our friend palantir, who has made beautiful use of tables in some of his science diaries, will be writing about more advanced use of tables, for both data and formatting.
Review: Last time, we learned that a table requires three pairs of tags: <table>, <tr> ("table row"), and <td> ("table data", or cell/square). When we put only one cell inside only one row inside a table, we get a box. If we coded nothing but
<table><tr><td>my text</td></tr></table>
we'd get a white box with no border, just our "my text" floating on the page by itself like this:
So, we learned that we can add some attributes into the <table> tag, like
border="x" to make a border x number of pixels wide, or
bgcolor="#F0F8FF" to give it the background color designated by the code. So,
<table border="1" bgcolor="#F0F8FF"><tr><td>my text</td></tr></table>
gives us
Now we're ready to move on to new information!
Lesson 10: Tables
Here's part of a table from our earlier diary about special characters:
| ♥ |
♥ |
¢ |
¢ |
⇔ |
⇔ |
| ♠ |
♠
|
€ |
€ |
† |
† |
| ♦ |
♦ |
¥ |
¥ |
π |
π |
Let's see how it's put together.
<table border="1" bgcolor="#CCFFFF">
<tr>
<td>♥</td> <td>♥</td>
<td>¢</td> <td>¢</td>
<td>⇔</td> <td>⇔</td>
</tr>
<tr>
<td><big>♠</td> <td>♠</td>
<td><big>€</td> <td>€</td>
<td><big>†</td> <td>†</td>
</tr>
<tr>
<td><big>♦</td> <td>♦</td>
<td><big>¥</td> <td>¥</td>
<td><big>π</td> <td>π</td>
</tr></table>
We start and finish the table with
<table> - </table> tags. The opening
<table> tag is where we've specified both the border and the background color for our table. Each row inside the table is opened and closed with
<tr> - </tr> tags. Inside each row, we have six cells, each enclosed by
<td> - </td> tags. (Note that the only spacing that matters is the spacing
inside a pair of
<td> - </td> tags. We are free to put each row or cell on a new line to help us keep track of what we've got, without changing how the table will look. Here, I have the pairs of cells with a symbol and its corresponding code on separate lines.)
Suppose I wanted to put column headers on that table, and make it clear they are headers? The simplest way to do this (and we like simple ways!) is to use a different color for the header row. It turns out that the background color (bgcolor) attribute does not have to go into the <table> tag. We can put it into a <tr> tag to color only one row, or we can put it into a <td> tag to color only one cell. Other rows or cells that are not included in our color assignment stay white (or gray if they're in a blockquote) unless we assign them a color of their own. So, let's look at our table with an added top row that has color, leaving the rest without color:
| Symbol |
Code |
Symbol |
Code |
Symbol |
Code |
| ♥ |
♥ |
¢ |
¢ |
⇔ |
⇔ |
| ♠ |
♠
|
€ |
€ |
† |
† |
| ♦ |
♦ |
¥ |
¥ |
π |
π |
<table border="1">
<tr bgcolor="#CCFFFF">
<td>Symbol</td><td>Code</td>
<td>Symbol</td><td>Code</td>
<td>Symbol</td><td>Code</td>
</tr><tr>
<td>♥</td> <td>♥</td>
<td>¢</td> <td>¢</td>
<td>⇔</td> <td>⇔</td>
</tr>
<tr>
<td><big>♠</td> <td>♠</td>
<td><big>€</td> <td>€</td>
<td><big>†</td> <td>†</td>
</tr>
<tr>
<td><big>♦</td> <td>♦</td>
<td><big>¥</td> <td>¥</td>
<td><big>π</td> <td>π</td>
</tr></table>
A table has both rows and columns. As you can see in the examples, though, we don't do anything to create the columns
per se. Instead, we define a number of cells in a row, and they stack up under the cells in the next row, effectively forming columns. Really? What happens if we don't put the same number of cells in each row?
<table border = "1"><tr>
<td>one potato</td>
<td>two potato</td>
<td>three potato</td>
<td>four</td>
</tr><tr>
<td>five potato</td>
<td>six potato</td>
<td>seven potato</td>
</tr></table>
| one potato |
two potato |
three potato |
four |
| five potato |
six potato |
seven potato |
Answer: It makes as many columns as there are cells in the row with the most cells, and it pads the shorter rows with empty cells at the end of the row.
You'll also notice that the table adjusts the column widths so they're proportional to the width of the contents. It will wrap if it runs out of space, and will make the rows taller as it needs to. It will still allocate more width to the columns with the most content, so that it doesn't add more height than needed and make some columns have blank space they don't need. Adding more rows with content of varying lengths will make its tweaking of column width and row height more complex. And obviously, images don't "wrap", so if we put a picture in, we'll be imposing a certain minimum width on the column with the picture.
| Congress shall make no law respecting an establishment of religion, or prohibiting the free exercise thereof; or abridging the freedom of speech, or of the press; or the right of the people peaceably to assemble, and to petition the Government for a redress of grievances. |
A well regulated Militia, being necessary to the security of a free State, the right of the people to keep and bear Arms, shall not be infringed. |
No Soldier shall, in time of peace be quartered in any house, without the consent of the Owner, nor in time of war, but in a manner to be prescribed by law. |
The right of the people to be secure in their persons, houses, papers, and effects, against unreasonable searches and seizures, shall not be violated, and no Warrants shall issue, but upon probable cause, supported by Oath or affirmation, and particularly describing the place to be searched, and the persons or things to be seized. |
So, how can this help us with formatting, not just chart-making? So far, we've been putting borders on our tables so we can see the how all the rows and columns are delimited. But remember, we don't have to. We can give our table a color, but we don't have to. We can make a plain table that is nothing but a series of invisible containers, as many of them as we define, and put stuff in them to our liking. Or we can use color with no lines to frame some content. Here are examples:
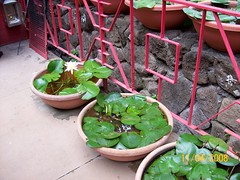
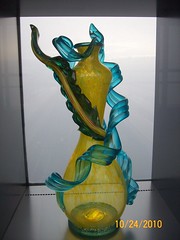
 |
The Museum of Glass in Tacoma, Washington should not be missed by anyone visiting the Pacific Northwest. |
 |
Here, we've defined one row with three cells, chosen picture sizes small enough to fit and leave space for another cell in between, and added some text in the middle cell.
In this example, we've used our ability to color only one cell to make a tight frame around a small picture. This table has one row with three cells. The center cell has the background color, while the outer two have no color assigned and contain only blank spaces, enough in each one to squeeze the center cell down to the width we want framing the picture.
If you don't know how to post pictures, we will be discussing that in the next couple of weeks, so don't panic! For now, all you need to know is that a table cell is a "container" just like a diary or a comment, and you can put any kind of content inside it, as long as it will fit. And by "fit", I mean that a diary is only so wide, so if you make a table with three columns and try to jam a full-size picture into each one, the table is not likely to cope gracefully.
We hope that this has given you a few ideas for how tables can be used to good effect on Daily Kos. Please use the comment thread to practice, if you like, and ask questions. I think nomandates will be here also, and we will check back for new comments for the next few days in case anyone comes late to the party and still feels like experimenting in this thread. Thanks for reading!
| In general, formatting "tricks" that can be done in a diary can also be done in a comment. Practicing your skills in comments (in this diary, for instance!) is an easy and low-stakes way to know what you're doing before you work on a diary. So while these lessons focus on how to do things in comments, know that the same tools will produce the same results in a diary. |
Preview Is Our Friend!
Preview is a lifesaver in TWO important ways! First, it shows us how our comment or diary will look when posted. That may NOT be the way you thought it was going to look when you composed it! Always take advantage of the ability to look at the preview and make sure everything works and looks exactly the way you planned. If it doesn't look right in Preview, your comment or diary will not magically improve after being posted!
Second, when writing a diary, Preview is also the way to SAVE your diary draft. If you're working on a diary, clicking Save & Preview periodically is a very good idea. Otherwise, if the site goes down, or your browser tab gets closed by mistake, you are back to the drawing board!
|
Additional Resources for Diarists
This diary is part of a series by nomandates and belinda ridgewood on the basics of enhancing diaries and comments at Daily Kos. All of them can be found at the New Diarists group page. Click the New Diarists' ♥ to follow the group and get all the diaries in your stream. Diaries in the series so far are:
If you have questions about any aspect of posting comments or diaries, feel free to post a comment and ask. These threads are for sharing, so more experienced Kossacks are welcome to both ask and answer questions, and to share advice and war stories.
|